Phantom power for microphone. Phantom power supply. Attention! Additional information on this scheme for user questions
Many who design audio equipment (in particular, preamplifiers) probably required some kind of phantom power supply. In addition to using such a block as part of the design(for example, a power supply for a mixing console), less often this unit may be required and as a stand-alone design. So, for example, musicians who use condenser microphones asked me to make such a unit, and even with an appropriate adapter for connecting the microphone to an active speaker or mixer without a built-in phantom power supply.
In general, the design couldn’t be simpler. Yes, you will need good stabilization and good noise filtering, which, in general, linear stabilizers like the LM317 do well with. The only and most important problem is where to get sufficient alternating voltage (at least 32V)? Transformers over 24V, it seems, are not in short supply, but they are a very specific thing that is not always at hand.
This is where it comes to the rescue voltage multiplier on capacitors and diodes. The scheme has long been known and very widespread; almost everyone has probably heard of it. And who hasn't heard - Google to the rescue :)
I will not dwell on the multiplier separately. I’ll clarify just one feature - diode multiplier inappropriate use on high currents loads. But, since standard phantom power consumers are ultra-low power, this solution is simply ideal for them.

Let's focus on a multiplier of 4. Indeed, finding a 12-15 volt transformer is as easy as pie. There is another reason for choosing a multiplier by 4 - this is the presence of a common point for the input and output, which is precisely a minus. And this is also a serious advantage. Thus, multipliers built according to other possible circuits (including with other multipliers) need to be powered from a separate winding or transformer, as shown in the figure below option I. This is due to the fact that in common circuit design, the negative output of the converter is connected to the zero point of the common supply (total ground), and combining the input and output of the multiplier at this common point, or - even more so - connecting them through another winding will lead to its failure ( breakdown of diodes).
This multiplier can be connected according to the circuit under option II, which means - significantly simplify the design and save on the transformer.

So let's look at the diagram below. Everything about it is more than simple. The multiplier mentioned above, common zero, stabilizer LM317, connected according to the standard circuit. Zener diode VD2 is added to protect the chip from maximum permissible voltage drop between input and output (according to the documentation - 35V). Indeed, such a difference can be short-term - at the moment of charging capacitor C7 or if the value of R5 is set too incorrectly (the second is unlikely). At this moment, the zener diode shunts the microcircuit, thus protecting it from failure. The reverse voltage of the zener diode should be no more than 35V, but at the same time not too small, so that a sufficient range is maintained for adjustment and stabilization. Especially for cases where the transformer produces more than 12V. Then you can set the desired value of the stabilizer output voltage (48V in our case) using R5. By the way, I would not recommend supplying an alternating voltage of more than 20V.
Let's look at it in a little more detail. C1 - C4 and VD1-VD4 in this case form a voltage multiplier by 4. After them, we provided double filtering to reduce the background.
First comes, in fact, a second-order filter on R1C5 and R2C6, then an active filter/stabilizer on LM317. And after the microcircuit - necessarily - capacitor C7, which prevents self-excitation of the circuit. In early modifications of the circuit without this capacitor, strong power supply noise often appeared and disappeared instantly if a capacitor was connected to the output or the load was capacitive in nature.
Trimmer resistor R5 sets the output voltage. Recommendations for setting it up are at the end of the article. R3, R4 and R5 we recommend using powerful ones (0.25W, 0.5W), because in some cases they will become hot.
We also recommend paying attention to VD6. If the circuit is powered from a separate transformer (or a separate winding), there is no need for it and it can be replaced with a jumper. However, if the circuit is powered from one of the windings of a transformer of a bipolar power source, or another stabilizer is powered from the same winding, a diode is needed to protect against a short circuit of the diode in the circuit of another rectifier connected to the same winding when connecting the signal ground. Why this short circuit can occur, which can lead to failure of the rectifier, and how a diode solves this problem is shown in the diagram below.
And here is a modified circuit for using the power supply as a separate device. There is a standard connecting a device that requires phantom power. It is supplied through limiting resistors R6 and R7 to the signal contacts of the device (for standard condenser microphones with an XLR connector these are pins 2 and 3, 1 is common), and the signal is directly fed through coupling capacitors C8 and C9 to the receiving device ( mixer, amplifier, sound card).
Also ready for you - developed and tested printed circuit board. The layout is above, below you will find a link to the file in Sprint Layout and Gerber format if you want to make the boards yourself. You also can order from us a ready-made factory printed circuit board and even an assembled device . To do this, contact us via the contact form!

Attention! Additional information on this scheme for user questions!
Many who have assembled this device using a 4-multiplier circuit complain about the background power supply.Therefore, I consider it necessary to pay attention to the following: diagram is needed adjust the circuit with trimming resistor R4 so that the background is minimal, and the voltage is maximum! A linear stabilizer works as a filter if the voltage drop across it is commensurate with the ripple amplitude. I deliberately did not specify the exact value of the divider resistors that select the output voltage so that the circuit could be adjusted to different transformers (from 10V to 16V). A condenser microphone is not so critical to power that it needs to achieve exactly 48V. Therefore, if the transformer you choose does not produce enough voltage for normal operation of the circuit, an output voltage of at least 37V will be acceptable.
Happy assembly everyone!
A phantom power source was required to connect the condenser microphone to the camera. The immediate question is: WHY? Because the camera records sound much better than the computer’s built-in sound card, and it simply already had a condenser microphone.
Almost all budget external sound cards still require additional phantom power. And those that do not require are beyond my budget. So I decided to try ordering such a source. 
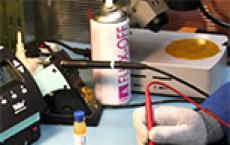
When connecting the microphone through it to the camera, there are no problems, everything works fine, everything is clear, it is recorded. However, the first thing I decided to do was take apart this interesting box.
The case is interesting because you can buy it separately for your radio-electronic needs. Another issue is the price, it is not very cheap. Up to three printed circuit boards can be placed inside such a housing. A wonderful thing, if not for the price) 
Inside the phantom power supply there is a scarf made of budget-friendly PCB, and the board itself is also soldered in a very budget-friendly manner. However, no interference is observed at the output during operation, at least such interference that I could measure with my multimeter. The output voltage is +47V instead of +48, I don’t think this is so critical. In any case, everything works as expected.
By the way, I tried to connect to the GoPro Hero 2 camera, the sound it produces is very mediocre. In fact, recording sound is not its primary task, and it copes with primary tasks with a bang.

We see a bunch of electrolytic capacitors from an unknown Chinese manufacturer. In any case, I don’t know such a manufacturer, but in my work I come across capacitor manufacturers very often.
Well, the transistor also turned out to be a little unsoldered, I corrected this issue. 
Speaking of the transistor and why it is not attached to either the radiator or the case. I let the scarf work for half an hour, controlling the temperature of the transistor. So it almost didn’t heat up. In a closed case the situation will be more severe, but I think its temperature will definitely not even come close to the maximum permissible.
By the way, it is worth noting that the power supply of this device is transformer, 18V, 600mA.
If anyone is too lazy to read, then everything is the same in the video and in addition you can evaluate the quality of recording through this phantom power supply. I compared the recording quality when recording through the power supply and through the built-in microphone of the camera.
I'm planning to buy +4 Add to favorites I liked the review +10 +13
Phantom power is the transmission of information signals and power simultaneously through a wire. Basically, remote power is used if it is not possible to connect to a 220 V supply network. Recently, such a system is increasingly used to power security and telephone equipment. The phantom power supply can also be successfully used to connect a microphone, keyboard or electric guitar.
Depending on the method of supplying the supply voltage, there are two types of this system. In the first case, the supply voltage is supplied through a separately laid cable or unused conductors of the main cables. In the second case, it is sent along the backbone cable along with the Ethernet network signal. In this case, additional cable conductors are not used.
The microphone's 48V phantom power is supplied through the signal leads. In this case, capacitors separate AC and DC circuits. It should be noted that the use of power must be approached with extreme caution, because if the microphone input is connected to an unbalanced signal source, unexpectedly turning on the power can cause damage to the device (for the simple reason that voltage will be supplied to it).
Phantom power does not have a negative impact on balanced sources. If a keyboard or electric guitar is connected to it, then it is necessary to use distribution devices, the task of which is to lower the supply voltage to the level required by the connected device. It is also recommended to ensure that the source to which the phantom power is connected is not powering other devices that require more current.

If we consider this phenomenon from a technological point of view, phantom power is a fairly convenient way to save copper, but all too often in practice various unpleasant situations arise. It is necessary to use a high-quality separator filter, otherwise the supply voltage may enter the signal circuits, and noise from switching power circuits may enter the receiver input, or the signal may be attenuated in the power filters.
At first glance, everything may seem quite simple and understandable, but this is by no means the case. The fact is that the task of the filter is not only to separate the constant and variable components. Therefore, it must also be broadband. A wide-band filter should not distort the shape of the signals. In order for the acceptable link length not to be significantly reduced, it must not lead to noticeable attenuation.

If we consider the practical application of remote power supply, it is worth noting that two adapters must be used via the P296 cable. That is, there should be an adapter at each end of the link. They must have separate power and information inputs. Experiments confirm: if adapters are used for a UTP5 cable, then when all cores of the cable are used to transmit power, the central power supply range will almost double.
There is only one type of microphone connection, known as phantom power. The specification for phantom power is given in DIN45596. Initially, the power supply was standardized at 48 volts (P48) through 6.8 kOhm resistors. The meaning of the denominations is not as critical as their consistency. It should be within 0.4% for good signal quality. Currently, phantom power is standardized at 24 (P24) and 12 (P12) volts, but it is used much less frequently than 48 volt power. Systems using lower supply voltages use lower value resistors. Most condenser microphones can operate with a wide range of phantom power voltages. Power supply 48 volts (+10%...-20%) is supported by default by all manufacturers of mixing consoles. There is equipment that uses lower voltage phantom power. Most often this voltage is 15 volts through a 680 ohm resistor (similar, for example, is used in portable sound systems). Some wireless systems can use even lower supply voltages, from 5 to 9 volts.
Phantom power is now the most common method of powering microphones due to its safety when connecting a dynamic or ribbon microphone to an input with phantom power enabled. The only danger is that if the microphone cable is shorted, or if you are using an older microphone design (with a grounded terminal), current will flow through the coil and damage the capsule. This is a good reason to regularly check cables for short circuits, and microphones for the presence of a grounded terminal (so as not to accidentally connect it to a live input).
The name "phantom power" comes from the field of telecommunications, where a phantom line represents the transmission of a telegraph signal using ground, while speech is transmitted over a balanced pair.
6.1 Phantom power types P48, P24 and P12
There is often confusion about the different but actually similar types of phantom power. DIN 45596 specifies that phantom power can be achieved at one of three standard voltages: 12, 24 and 48 volts. More often than not, the way the microphone is powered can vary depending on the voltage supplied. There is usually no indication that the microphone is receiving power, but a voltage of 48 volts will certainly work.
Creating a clean and stable 48 volt voltage is difficult and expensive, especially when only 9 volt Krona batteries are available. Partly because of this, most modern microphones are capable of operating with voltages ranging from 9-54 volts.
6.2 Phantom power for electret microphones
The diagram below (Fig. 19) is the easiest way to connect an electret microphone capsule to the balanced input of a mixing console with 48 volt phantom power.
Please note that this is only the simplest way to “spandorize” an electret microphone to the remote control. This scheme works, but has its drawbacks, such as high sensitivity to phantom power noise, unbalanced connection (prone to interference) and high output impedance (long cables cannot be used). This circuit can be used to test the capsule of an electret microphone when connected to a mixing console using a short cable. Also, when using this circuit, the noise of transient processes (for example, when turning on or off phantom power, when connecting to a mixing console, as well as disconnecting from it) is at a very high level. Another disadvantage of this circuit is that it does not symmetrically load the phantom power supply circuit. This may affect the performance of some mixing consoles, especially older models (in some mixing consoles the input transformer may short out and burn out, in this case pins 1 and 3 are shorted through a 47 Ohm resistor).
In practice, this circuit works when used with modern mixing consoles, but it is not recommended for actual recording or any other application. It is much better to use a balanced circuit; it is much more complicated, but much better.
6.3 Symmetrical connection diagram for an electret microphone
The output of this circuit (Fig. 20) is symmetrical and has an output impedance of 2 kOhm, making it possible to use it with a microphone cable up to several meters long.The 10uF capacitors that are included at the output of the Hot and Cold pins must be high quality film capacitors. Their rating can be reduced to 2.2 µF if the input impedance of the preamplifier is 10 kOhm or more. If for some reason you use electrolytes instead of film capacitors, then you should select capacitors designed for voltages greater than 50V. In addition, they need to include 100nF film capacitors in parallel. Capacitors connected in parallel with the zener diode should be tantalum, but if desired, 10nF film capacitors can be used in conjunction with them
The connected cable must be two-core shielded. The screen is soldered to the zener diode and not soldered to the capsule. The pinout is standard for an XLR connector.
6.4 Improved electret microphone connection to phantom power
This circuit (Fig. 21) provides lower output resistance than the circuit discussed above (Fig. 20):BC479 can be used as bipolar PNP transistors. Ideally, they should be matched as closely as possible to minimize noise and gain consistency. Keep in mind that the voltage between collector and emitter can reach 36V. Capacitors of 1 µF should be high quality film capacitors. The circuit can be improved by adding 22pF capacitors in parallel with the 100kΩ resistors. To minimize self-noise, 2.2kΩ resistors must be carefully selected.
Source: PZM Modifications web page by Christopher Hicks.
6.5 External phantom power supply
This is a diagram (Fig. 22) of an external phantom power supply used with mixing consoles that do not have phantom power:
The +48V power supply is grounded to signal ground (pin 1). The +48V voltage can be obtained using a transformer and rectifier, using batteries (5 pieces of 9V each, a total of 45V, which should be enough), or using a DC/DC converter powered by a battery.
Between the signal wires and ground there should be two 12V zener diodes connected back to back to prevent a 48V pulse through the capacitors to the input of the mixing console. Resistors with a nominal value of 6.8 kOhm should be used with high precision (1%) to reduce noise levels.
6.6 Receiving voltage +48V for phantom power
In mixing consoles, phantom power voltage is usually obtained using a separate transformer or DC/DC converter. An example circuit using a DC/DC converter can be found at http://www.epanorama.net/counter.php?url=http://www.paia.com/phantsch.gif (circuit of one microphone preamplifier from PAiA Electronics).If you use a battery, you might find it helpful to know that many microphones that require phantom power work just fine with voltages less than 48V. Try 9V and then increase it until the mic starts working. It's much easier than using a DC/DC converter. However, it must be remembered that the sound of a microphone powered from a lower voltage may be very different, and this should be taken into account. Five 9V batteries will provide 45V power, which should be enough for any microphone.
If you use batteries, short them with a capacitor to limit their noise in the audio path. To do this, you can use 10 µF and 0.1 µF capacitors in parallel with batteries. The batteries can also be used with a 100 Ohm resistor and a 100 µF 63V capacitor.
6.7 Effect of phantom power on a connected dynamic microphone
Connecting a dynamic microphone with a two-wire shielded cable to the input of a mixing console with phantom power turned on will not cause any physical damage. So there should be no problems with the most popular microphones (if they are wired correctly). Modern balanced dynamic microphones are designed in such a way that their moving parts are not sensitive to the positive potential received from phantom power, and they work great.Many older dynamic microphones have a center tap grounded to the microphone body and cable shield. This can cause the phantom power to short circuit to ground and burn out the winding. It's easy to check if this is true in your microphone. Using an ohmmeter, the contact between the signal pins (2 and 3) and ground (pin 1, or the microphone body) is checked. If the circuit is not open, do not use this microphone with phantom power.
Do not attempt to connect a microphone with an unbalanced output to the input of a mixing console with phantom power. This may cause equipment damage.
6.8 Effect of phantom power on other audio equipment
Phantom power at 48V is a fairly high voltage compared to what conventional audio equipment typically operates with. You must be very careful not to turn on phantom power on inputs that are connected to equipment that is not designed for this purpose. Otherwise, it may damage the equipment. This is especially true for consumer-grade equipment connected to the remote control via a special adapter/converter. For a safe connection, a transformer isolation is used between the signal source and the remote control input.6.9 Connecting professional microphones to computers
Typical computer audio interfaces provide only 5V power. Often this power is called phantom power, but it should be understood that it has nothing to do with professional audio equipment. Professional microphones typically require 48V power, and many will work with 12 to 15 volts, but a consumer sound card won't be able to provide even that.Depending on your budget and technical savvy, you can either switch to using consumer microphones or make your own external phantom power supply. You can use either an external voltage source or the power supply built into the computer. As a rule, every computer power supply has a +12V output, so all that remains is to connect it in the correct way.
7. T-powering and A-B powering
T-powering is the new name for what was previously called A-B powering. T-powering (short for Tonaderspeisung, also covered by DIN45595) was developed for use in portable devices, and is still widely used in film sound equipment. T-powering is mainly used by sound engineers in fixed systems where long microphone cables are required.T-powering typically has 12V supplied to the balanced pair through 180ohm resistors. Due to the potential difference on the microphone capsule, when a dynamic microphone is connected, current will begin to flow through its coil, which will negatively affect the sound, and after some time will lead to damage to the microphone. Thus, microphones specially designed for power supply using T-powering technology can be connected to this circuit. Dynamic and ribbon microphones will be damaged when connected, and condenser microphones will most likely not work properly.
Microphones using T-powering are, from a circuit design point of view, a capacitor and therefore prevent DC current from flowing. The advantage of T-powering technology is that the shield of the microphone cable does not have to be connected at both ends. This feature avoids the appearance of an earth loop.
The connection diagram for a microphone, powered using T-powering technology from an external source, to a mixing console with a balanced input is shown in the figure below (Fig. 23):
 |
| Fig. 23 - T-powering external power supply circuit |
8. Other useful information
Microphones with a balanced output can be used when connected to an unbalanced input, making the appropriate wiring (this is a common practice). Microphones with unbalanced output can therefore be included in the balanced input, but this does not provide any advantages. An unsymmetrical signal can be converted into a symmetrical one using a special device - Di-Box.Those that are not so-called electrets require an external power source. According to various standards, the voltage required to provide the potential difference between the capacitor plates, as well as to power the preamplifier built directly into the microphone body, ranges from +12 to +48 Volts. The microphone electronics determines the voltage required for each individual model independently, so the user does not need to think about exactly how many volts are required for one and how many for another model.
Phantom power got its name because, along with the audio signal passing through the cable from the microphone to the next device in one direction, along the cable, it is absolutely invisible to the user, i.e. like a phantom, in the other direction, from the equipment capable of providing phantom power, the voltage necessary to power the microphone passes. Almost all modern audio interfaces and recorders have the ability to turn on phantom power. Whether separately for each channel or group of channels.
If you find this article informative and perhaps interesting to your friends or colleagues, then the author would be glad if you share it with them or recommend it. I will also be glad to see your comments or thoughts on the topic.
If you do not want to miss the next article, a review of new equipment and other news from the portal YourSoundPath and want to be notified about them in a timely manner, I recommend subscribing to the mailing list using the form below.