Application for distributing working Internet. Programs for distributing WiFi. Programs for creating a virtual WiFi distribution point
There is often a situation when the Internet is connected to one computer or laptop, and there is a need to distribute this Internet to other devices. Smartphone, tablet, or other computer. If you came to this page, then most likely you know that you can distribute Wi-Fi from a computer and without a router. It’s better, of course, to buy an inexpensive router, connect the Internet to it, and it will distribute it to all devices. But this is not always possible. It is in such cases that you can use a laptop or computer with a Wi-Fi adapter as a router.
There are several ways to launch a virtual Wi-Fi network and force your computer to distribute the Internet. I would highlight three methods: using commands via the command line, via a mobile hotspot, and using third-party programs. Now we will take a closer look at each method. You can choose a more suitable option for yourself and proceed to setup using the instructions that you will find in this article, or using the links that I will leave during the writing process.
How to distribute the Internet via Wi-Fi from a computer:
- Via the command line. This is the most popular method that works in Windows 7, Windows 8 (8.1) and Windows 10. You need to launch the command line, run a few commands, and open general Internet access. After this, the computer will begin broadcasting a wireless network to which you can connect your devices and use the Internet. I have already prepared two detailed instructions: , and . The instructions are almost the same, they are simply written based on the example of different operating systems.
- Using the Mobile Hotspot feature. This is a standard feature that appeared in Windows 10. Everything is much simpler there. Just set the Wi-Fi network name, password, select a connection for sharing, and launch the access point. Setup instructions: . If you have ten installed, I advise you to try this method first. It has its own nuances, which I wrote about in the article linked above.
- Using third party programs. There are many free and paid programs that can be used to launch a virtual Wi-Fi network on your computer. In fact, these programs also start distribution via the command line, just a little more convenient. No need to copy commands, etc., just click on the button. But these programs do not always work stably and correctly. I also wrote about them in a separate article: .
The instructions to which I provided above are quite sufficient to set everything up. But since I decided to make one large and general article on this topic, I will write a detailed guide for each method. Of course with pictures.
Note! If you want to distribute Wi-Fi without a router using a desktop computer (PC), then you must have a Wi-Fi adapter. Internal or external, which is connected via USB. I wrote about such adapters. In laptops this adapter is built-in.
It doesn’t matter whether you have a PC or a laptop – Wi-Fi should work. The driver for the wireless adapter must be installed, and the "Wireless network" or "Wireless network connection" adapter must be in the list of connections. To check whether you can start Wi-Fi sharing, launch a command prompt as an administrator and run the command netsh wlan show drivers. Next to the line "Hosted network support" should be "yes".
Let's move on to the settings.
How to distribute Wi-Fi via the command line?
Let me remind you that this method is suitable for Windows 10, Windows 8 and Windows 7.
You need to run the command line as an administrator. In Windows 7, open "Start", then "All Programs" - "Accessories". Right-click on "Command Prompt" and select "Run as Administrator". In Windows 10 and 8, you can simply right-click on the Start menu and select "Command Prompt (Admin)."
Copy and execute (using the Enter key) the following command:
netsh wlan set hostednetwork mode=allow ssid="my_wi-fi_network" key="12345678" keyUsage=persistent
This command specifies the name ssid="my_wi-fi_network" and password key="12345678" for a Wi-Fi network that will be distributed by a PC or laptop. You can change your name and password if you wish.
To start the access point itself, you need to run the following command:
This is the result you should get after executing the first and second commands:

Devices can already be connected to the running Wi-Fi network, but the Internet will not work yet. Need to open public Internet access.
To do this, go to "Network Connections" (Network and Sharing Center - Change adapter settings). Right-click on the connection through which you are connected to the Internet and select "Properties".
Next, on the “Access” tab, you need to check the box next to “Allow other network users to use this computer’s Internet connection” and select a new connection from the list. The connection name will contain a number (not necessarily the same as in my screenshot), and below is the name of the network, which is indicated in the first command.

netsh wlan stop hostednetwork
And run it again with the command:
netsh wlan start hostednetwork

After these steps, you can connect to a Wi-Fi network called "my_wi-fi_network" (if you haven't changed it), and use the Internet. As you can see, without a Wi-Fi router.
If you encounter a problem where devices cannot connect to an access point, or connect but the Internet does not work, then first of all, disable your antivirus and firewall. Also see the articles, links to which I will provide below.
Might be useful:
- – when there is no access tab, drop-down list, etc.
- - solutions to various problems. This includes the errors "The hosted network could not start. The group or resource is not in the correct state to perform the required operation."
It should be noted that a computer does not always willingly turn into a router. Sometimes you need to dance with a tambourine :)
Set up Mobile Hotspot (Windows 10 only)
In this case, everything is much simpler. Open "Options" (the button with the gear icon in the Start menu) and go to the "Network and Internet" section.
The "Mobile hotspot" tab contains all the settings for this function. The network name and network password will immediately be written there. If you want to change them, click on the "Change" button. Set new ones and save.


If any problems occur, disable your antivirus and firewall.
I decided to make another separate page on which to collect all the useful programs that may be useful when setting up/connecting to Wi-Fi, distributing Wi-Fi from a laptop, and when working with 3G/4G modems. Well, other programs that somehow relate to this topic. There are many good, free programs that allow you, for example, to start distributing the Internet via Wi-Fi from your computer. Or look up your forgotten Wi-Fi password. Well, and separate software with which you can configure 3G/4G modems and perform other operations with them (firmware, uploading .prl files, etc.).
All the programs that you can find and download on this page have been tested by me, and most likely detailed instructions have been written for them, a link to which will also be provided.
Programs for setting up Wi-Fi distribution
– with this program you can quickly start distributing the Internet via Wi-Fi from your computer. The program is completely free, and in Russian. Just set the network name, password, click on the Start button and open general access to the Internet. There are settings, you can configure the program to start when you turn on the computer, and the automatic launch of a virtual Wi-Fi network.
A list of clients that are connected to your Wi-Fi is also displayed. Switch Virtual Router works fine in Windows 10, I checked it. Well, in Windows 7 and 8 there will be no problems.
Programs for working with Wi-Fi networks
 is a free program that allows you to view information about Wi-Fi networks that your computer sees. Most often, the inSSIDer program is used to find the most free channel for a Wi-Fi network.
All information in the program is displayed in the form of graphs. In addition to the channel of a specific Wi-Fi network, you can find out its MAC address, name (SSID), signal strength, type of protection, operating mode, etc. The program supports Wi-Fi networks at a frequency of 5GHz.
 is another free program that shows the necessary information about Wi-Fi networks: channel, signal strength, RSSI, MAC address, etc. It is a little simpler than inSSIDer. True, less functional.
Some antivirus programs see this program as a threat. I think this is a false positive due to the somewhat spying features of the program.
Programs for working with 3G/4G modems
 AxesstelPst EvDO BSNL 1.67– a program that allows you to configure a 3G/4G modem (antenna) for maximum reception. I believe that this program should be used by everyone who connects to the Internet via a 3G modem.
We launch the program on the computer, look at certain indicators, and then use them to configure the modem or antenna and record them. This will increase the speed of 3G Internet and improve the stability of its operation.
I am gradually filling up the page. You can suggest your programs in the comments.
To connect several devices to the Internet at once, including wirelessly, a classic Wi-Fi router is most often used. Modern routers do an excellent job of providing a reliable and interference-resistant connection, but a router may not always be at hand. A standard situation - you decided to spend several days at the dacha and took with you only a laptop with a USB modem. It would be nice to be able to connect to the Internet through it not only on your laptop computer, but also on mobile gadgets such as a smartphone or iPod. Those. There is a need to use a laptop as a separate Wi-Fi access point, to which other devices can be connected, similar to a regular router. If anyone didn’t know, the functionality for implementing such a task is built into the Windows 7/10 operating systems, the main thing is that your laptop is equipped with a wireless adapter.
So, in this article, in a step-by-step manner, we will look at all the main ways to distribute Wi-Fi from a laptop running Windows 7 or Windows 10. We will create an access point both using the system itself and using the most popular third-party programs. The Internet source for the laptop will be a 3G modem from one of the mobile operators. However, all the schemes discussed will also work in the case of a regular wired Internet connection.
Creating a virtual Wi-Fi router via the command line
For users who are not familiar with the command line, this method will probably seem quite complicated and tricky. However, if you follow the instructions exactly, then no problems should arise. Most importantly, this method is universal, i.e. works in both Window 7 and Windows 10, and does not require the installation of any additional applications.
First of all, let's launch the command line itself as an administrator. You can do this through the search bar of the Start menu, right-clicking on “Command Prompt” and selecting “Run as administrator.” In Windows 10, simply right-click on the Start menu icon and select “Command Prompt (Admin).”
In the console we immediately execute the command netsh wlan show drivers to make sure that the laptop’s Wi-Fi adapter is currently capable of operating in access point mode. After entering the specified command, press Enter and look for the line “Hosted network support.”
If “Yes” is next to it, then everything is in order and you can move on to the next step, but if it says “No”, then there is no point in continuing, since the adapter is not ready to distribute Wi-Fi. The reasons for the lack of hosted network support can be very different - from incorrectly installed (or old) drivers to incompatibility of the current version of Windows with the installed hardware. We have devoted a separate article to ways to solve such a problem (see “”), so now we will not focus on them and will move on.
At this stage, we need to enter a command to initialize the created Wi-Fi virtual host. It looks like this:
netsh wlan set hostednetwork mode=allow ssid=InternetNout key=87654321
- InternetNout – name of the wireless network;
- 87654321 – password.
If everything went well, a corresponding message will appear, as in the screenshot.

Now we launch our network with the command netsh wlan start hostednetwork, after which we should see the message “The hosted network has started.”

You need to check whether a new wireless connection has indeed appeared. Go to the “Network and Sharing Center” and find the network we created InternetNout.

True, its status is “Without network access”, which categorically does not suit us. In order for a virtual Wi-Fi point to be able to distribute the Internet, it must gain access directly to the connection through which the laptop itself receives the Internet. In our case it is Ethernet 3.

Click on it, and then click on the “Properties” button.

Next, go to the “Access” tab and check the box next to “Allow other network users to use this computer’s Internet connection.” Below, select the target connection from the drop-down list. For us this is “Local Area Network Connection* 14”.

Click “OK” to apply the parameters. Now in the network control center the status InternetNout changed to “Internet”, which is what we wanted.

We pick up the smartphone and in the corresponding settings section we check whether the device sees the created Wi-Fi point. If all the steps described above are completed, the network will certainly be detected. Click on it, enter the password and wait for the connection to occur.

The laptop will start distributing the Internet to our smartphone via Wi-Fi. The command allows you to display information about the network, for example, the number of connected clients netsh wlan show hostednetwork. To disable the access point, run the command netsh wlan stop hostednetwork.

Distributing Wi-Fi using a computer-to-computer wireless network in Windows 7
This method allows you to create an access point without any manipulations with the command line, but the method only works in Windows 7. First, open the “Network and Sharing Center”, and then follow the link “Set up a new connection or network”.

In the window that opens, select the item “Set up a wireless computer-to-computer network,” and then click “Next.”

Fill in the “Network name” and “Security key” fields, then click “Next” again.

A window will appear notifying you that the network is ready to use. At the same stage, you are prompted to enable Internet connection sharing. This must be done by clicking on the appropriate link.

Now all that remains is to wait for the operation to complete.

To see the newly created network, in the “Network and Sharing Center” on the left, you need to click on the “Manage wireless networks” link.

Here you can manage connections - delete, add, change properties, set priority.

Mobile hotspot in Windows 10
In Windows 10, it is possible to very quickly organize an access point for mobile devices through the Settings utility. Launch the application and go to the “Network and Internet” section. In the menu on the left, select “Mobile hotspot”.

If your laptop is connected to the Internet wired or using a USB modem, on the page that opens you can allow sharing of the Internet connection between multiple devices. That is, the same Wi-Fi access point will appear through which the Internet will be distributed from the laptop to other devices. To activate the hotspot, move the slider located at the top to the “On” position.

The network name and password to access it will be indicated below (they are generated automatically). The network exists (we call it DESKTOP-EHJUIN4 3118), but does not yet have access to the Internet, as you can verify by going to the network control center.

To open this access, you need to repeat all the same steps that we performed when working with the command line. We go to the Properties of the connection responsible for “supplying” the Internet to the laptop, and on the “Access” tab, put a checkmark next to the corresponding item. Below, select the desired connection from the list for which you open access to the Internet. Save the changes with the OK button.

We make sure that the network is now connected to the Internet.

We connect to it on a smartphone or any other device.

Popular programs for distributing Wi-Fi from a laptop
If all of the above methods do not suit you or if they were not used to distribute the Internet, it makes sense to use third-party programs, of which there are a great many. We will look at the two most convenient in our opinion.
MyPublicWiFi
This application has many positive reviews and has a simple interface that allows you to start distributing the Internet via Wi-Fi from your laptop after just a couple of clicks. Download the program from the official website mypublicwifi.com and install it on your laptop computer. During installation you will need to restart your laptop. Next, launch the utility and set the settings for the virtual access point.

We enter the network name and password, and also indicate the connection through which the Internet will be distributed via Wi-Fi. The virtual network is launched by clicking the “Set up and Start Hotspot” button. The program has minimal settings, so understanding them will not be difficult.

Connectify Hotspot
Another popular program that makes it possible to easily distribute Wi-Fi from a laptop to any portable devices. Download the Russian-language version of the utility at http://www.connectify.me/ru/, install it and restart the computer. Let's launch the program. On the Settings tab we see that the application can operate in several modes. By default, the “Wi-Fi hotspot” mode is selected – this suits us. We set the parameters of the virtual router approximately as in the screenshot below.

Please note that we have created a new wireless access point, receiving the Internet through the same Wi-Fi. The program allows this configuration. Having completed all the settings, launch the point by clicking the button at the bottom of the window. After a few seconds of waiting, the network should appear. We find it on the smartphone and connect after entering the password.

We did not encounter any difficulties - after a successful connection, the Internet distribution from the laptop occurred as if it were a regular router. All users connected to your Wi-Fi will appear in the Clients tab of the Connectify Hotspot app.

Note that to create an access point we used the free version of the program, the functionality of which turned out to be quite sufficient. If you need advanced features, you will, of course, have to pay.
This is, perhaps, all we wanted to tell you about the topic of distributing Wi-Fi from a laptop using Windows 7/10 or using special programs. If the virtual router does not want to be created, then most likely there are problems with the adapter drivers or it does not support operation in access point mode at all (the latter is unlikely). If the network appears, but after connecting to it the sites do not load, then public access to the Internet is not open or is blocked by a firewall/antivirus. Write about any difficulties you encounter in the comments below, and we will work together to try to help you.
Did you know that your laptop, in addition to performing various everyday tasks assigned by you, can also provide a Wi-Fi signal? Surprised? Well, let's find out!
Modern computers are devices that have a built-in wireless adapter that can not only receive a signal, but also distribute it. A little further, users can download a free program for distributing WiFi from a Windows 7, 8, 10 laptop and slightly expand the functionality of their PC.
After all, now your laptop can share the Internet with other devices that are within the range of the signal it distributes. And it's very convenient! Sometimes it happens that a tablet, smartphone, computer or other similar device requires Internet access, but it does not exist. This is where this very useful function of your laptop will come in handy, with the help of which you can provide an Internet connection to the devices that need it. We invite you to look at the list of programs!

This utility, which allows you to distribute Wi-Fi from a laptop, is especially popular among Internet users. In addition, it is absolutely free and has a simple interface. Anyone can understand it, even without basic knowledge of English. The application performs its functions perfectly, automatically starting a signal every time you turn on the Windows system.

Connectify
This is a program whose main task is to distribute a Wi-Fi signal, just like the previous one, it is very easy to use. It is equipped with many features and has a great interface. Conventionally, it can be classified as free. This is because you won't have to pay for basic use. But for the functions of expanding the signal coverage area and distributing the Internet to other gadgets that do not have a WiFi adapter, you will still need to pay.

Using the mHotspot utility, you can easily distribute a Wi-Fi signal to any other devices. But this tool has one special difference from similar ones: it has a limit on the number of devices connected to the distributed Wi-Fi. This application gives you the opportunity to monitor incoming and outgoing traffic, the speed of reception and upload, as well as the total time of Internet signal distribution.

This is small software with a minimum number of settings. A small window is available to the user for work, which is very convenient. Its main advantage is the absence of unnecessary elements. The user only needs to set a login and password.

This application is a little reminiscent of the previous program. It is just as small and equipped with a minimal set of settings. To start working with it, you just need to enter the login and password for your access point, select what Internet connection you need, and that’s it. The program is ready to perform its functions. All devices connected to this application will be displayed at the bottom of it.

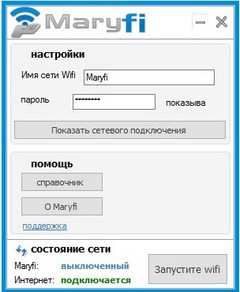
This small program is provided to the user absolutely free. MaryFi has a very simple interface that supports the Russian language. You don't have to spend a lot of time setting up this application. With it, you can easily and quickly create your own access point.
If you need a program that does not require installation on your computer, then Virtual Router Plus is exactly what you are looking for. To start working with it, you just need to find and run the EXE file, which is located in the archive. In order for other gadgets to find your access point, you must set a username and password. That’s it: just click “OK” for the application to begin performing its functions.

The Magic WiFi utility, like the previous one, does not require installation on a PC. All you need to do is move the program file to the place where it will be most convenient for you to use it. Moved? All that remains is to launch it. Setting up the application will not take much of your time. You will need to enter a login with a password and indicate the type of Internet connection.
After connecting, the program will display a complete list of gadgets that are connected to your Wi-Fi. These are all the functions that this tool has. In addition, it is worth noting that Magic WiFi differs from its peers in that it has a wonderful, updated interface that is a pleasure to work with.

Conclusion
All applications presented on this page have one common task - to help the user create their own Internet access point. And each of them does it perfectly. All you need to do is decide which one will be most convenient for you to work with. The main thing is to remember to update your browser. It is very important!
If the information from this article helped you decide on the choice of the necessary software, then we will be very glad! We will also be pleased if you spend a little of your time and write a review or rate this material. Leave a comment and share your knowledge with a friend so that he can also download a WiFi driver for Windows 7, 8 and 10 that allows you to distribute a signal. Thank you for your attention!

In our age of digital and modern technologies, it is impossible for the average city resident to imagine life without the Internet. One of her sons can be called WiFi. And the question naturally arises: how is it still necessary to distribute WiFi from a laptop if there is no possibility (or desire) to connect a router. Let's look at this in more detail.

Before distributing WiFi from a laptop
Before you start setting up WiFi distribution via a laptop, you need to make sure that your device is equipped with a built-in device for Internet distribution: a WiFi adapter or USB or PCL type. Their availability can be viewed in the Control Panel in the Network and Internet tab. If you find the Wireless Network item in Network Connections, then you can safely start organizing WiFi distribution.
WiFi is a trademark of the Wi-Fi Alliance. Provides connectivity via the standard IEEE 802.11 protocol. In general, it is a wireless network that can be used by all devices that support a similar transmission standard.
Programs for creating a virtual WiFi distribution point
The first step is to create a virtual access point. It will be your laptop. To make a WiFi point from it, you can download free programs from official websites.
mHotspot
One such program is called mHotspot. This software does not require installation. After it is downloaded, you need to launch mHotspot. The necessary program settings will be indicated there. For example, a field called Mhotspot name enters the name of the future network. This is what will be visible in the list of points available for connection.
You can download the program from the official mHotspot website.
Window for working with the mHotspot program
The next field is called Password. This is the password. It must be at least eight characters. It is important to enter it in order to secure the network from access to it by unauthorized people.
A field called Max Clients controls the number of gadgets that can be connected to the network at the same time. Their maximum number is ten. If one is indicated in this field, then no one except your computer will be able to connect to it. Click Start Mhotspot and proceed to creating an access point.
Video: how to use mHotspot
MyPublicWiFi
This is another program that can be downloaded on the Internet - MyPublicWiFi. By following the link to the downloader’s official website, you can download the software to your laptop. The program does not require installation and works immediately after downloading.
MyPublicWifi working window
The MyPublicWifi program allows you to make a Wifi access point from your computer. Operating instructions:
- Download MyPublicWifi (preferably version 5.1).
- Install the program.
- Reboot your laptop.
- Launch MyPublicWifi (or run the MyPublicWifi program as an administrator, if it gives an error during normal startup).
- Specify the Automatic HotSpot configuration item.
- select the name of the network to be created in the Network Name (SSID) field.
- Specify the password in Network Key.
- Select (check) Enable Internet Sharing.
- In the list, select connecting your laptop to the Internet.
- Click the Set up and Start Hotspot button.
MyPublicWifi works great and does not require much effort to connect
Creating an access point: three best ways
Distribution via existing Internet connection
Windows 7 and 8 operating systems can distribute Wi-Fi via an existing Internet connection.
In order to make an Internet distribution, you must follow these points:
- Start.
- Control Panel.
- Network and Internet.
- Network and Sharing Center.
- Change adapter settings.
- Wireless Network Connection 2. Rename it as desired. As you wish.
- We find our own active connection. Basically it is called local area connection. May also be called Virtual WiFi.
- In the properties of the active connection, find the “access” tab and click on it. In this tab, check the boxes, that is, we agree with all the points. Namely:
- allow other users to use this network;
- Allow other users to manage connections to the selected network.
- Select your active connection from the list. That is: local network connection (or whatever name you renamed the connection to).
- Click the "OK" button and restart the computer.
If you want your smartphone, tablet or laptop to be able to use this access point, you only need to run the Wi-Fi distribution program. And on the devices that will be connected, you must enter network access passwords.
A way to set up WiFi distribution using the command line
The above methods do not work well if you need to distribute WiFi from a computer on which Windows 10 is installed.
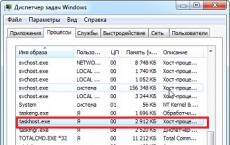
What does the command line look like on a laptop screen?
Steps to distribute wireless networks using the command line:
- Check the possibility of distribution. You need to run a command prompt as an administrator and enter the command netsh wlan show drivers.
- Read the item “Support for a hosted network” (if the settings are in English, it will say Hosted Network). The word “yes” should be indicated there.
- Write the following item on the command line: netsh wlan set hostednetwork mode=allow ssid=remontka key=secretpassword. At the same time, the command contains such instructions as “remontka” - this is the name of the wireless network (you can write your own, spaces are not used). Secretpassword is the secret password for WiFi. You choose it yourself.
- After all the data has been entered, enter the command: netsh wlan start hostednetwork.
- Right-click on the Start menu on the desktop and select “Network Connections.”
- In this list, select the Internet connection that is currently in use. Right-click to open the “Access” tab. Allow access to other users.
Configuring network capabilities via the command line
Eventually, a notification will appear on the screen that the wireless network is running. If no errors or failures occur, then you can connect phones, tablets and laptops to this network. They will now have access to the Internet.
Access point with Windows 7: computer-to-computer network
Video on how to set up WiFi distribution from a computer via Windows 7
In order to organize a wireless connection on Windows 7, you need to create a computer-to-computer network. In the lower right corner of the screen (where the clock, date, quick launch icons are located. This is called the tray) find “Internet connection”. Click on it, and then select “Network and Sharing Center”.
A window will appear. In it you need to select the “Set up a new connection” item. And click “Set up a wireless network “Computer-Computer” and “next”.
In the new window, fill in three fields:
- network name (come up with it yourself);
- security type (WPA2-ptersonal is best);
- security key.
Going to the “Network and Sharing Center” in the “Change advanced sharing settings” section, check the “Enable” box on all items. Don’t forget to check the box: “remember network settings”. Click the “next” button.
After the system configures Internet distribution via WiFi, in the window that appears, you will need to click “Enable Internet connection sharing.”
The setup was successful if after this the computer can easily distribute the Internet via WiFi
Security issues when distributing Wi-Fi without a router
Since as a result of organizing a virtual access point, an account is created with standard parameters, the name admin, any person who is at least somewhat familiar with the network can easily connect to it.
To prevent this from happening, it is important to know some points. Actions that are necessary to protect yourself and the network from intrusion by interviewed guests.
Window 192.168.0.1.
In the address bar of your browser (any) enter 192.168.0.1. A window will load on the screen in which you will need to enter the admin name and password. Go to the Maintenance tab in the section called Administrator. In the New Password field, enter a new, complex password. It must be remembered. You will need it when connecting other devices to the network. By clicking on Confirm Password we confirm that we are saving the written password. Using the same principle, we change the Login Name. At the end of each action taken, click Save Settings. This means: save the settings.
This way we have protected your account. With this help you can change all network settings. Including connecting and disconnecting devices, as well as blocking gadgets so that they cannot connect to this network.
Let's move on to directly protecting the access point. In an already open tab in the browser, we find an item called Setup, that is, Settings. In it, select the Wireless Settings section. Will open a new window. It requires you to select a function called Manual Wireless Connection Setup. In the settings section, which is located in Wireless Network Settings, set a new network name (SSID). It should be quite complex.
If you want to prevent users of other gadgets from seeing the network you are setting up, then check the Enable Hidden Wireless box.
We connect the tablet, smartphone and laptop to distribution
After Wi-Fi distribution is organized, you will need to connect smartphones, planets and other gadgets with wireless connection support to the newly-minted “router” in the form of a laptop.
Devices running on the Android operating system have connection features. Of course, first of all, it is better to check whether other devices are allowed to access the network.
If this is the case, then you need to download the adb program. It is designed for the Internet from Windows to Android devices. The next step is to enable a mode called “USB Debugging” in the settings of your Android tablet or smartphone. And after that, connect the gadget via a USB cable to the laptop.
Unpack the folder with the adb program and run AndroidTool.exe. A window will open in which you will need to click the Refresh Devices button. On the right there will be a list called Select Domain Name Server (Dns)... There you select your DNS server. After clicking the Show Android Interface button, the application will be installed on your tablet.
Give the USB Tunnel program superuser rights on the tablet. And feel free to press the Connect button.