How to use dropbox and what is it? Registration in dropbox. Dropbox: installation, registration, configuration and operation. Cloud data storage, access to Dropbox files How to add files to your Dropbox account
Dropbox is a cloud data storage service. This is a location on the server. Using dedicated storage, you can exchange data with other Internet users. This is convenient because you can send large amounts of information to users. In our article we will tell you how to create a data cloud and how to register for Dropbox.
With Dropbox, you can access your data from all your computers, phones, or tablets. All your information is protected and stored on the server. In order to log in to the Dropbox system, follow the link to the official Dropbox website. Click the log in button.  Enter the username and password specified when registering on Dropbox.
To register in the Dropbox system, click the register button. The system prompts you to fill out a registration form. Enter your first name, last name and email address. Click registration. Next, the system will ask you to select a tariff plan.  A basic Dropbox account is free. When you choose the basic plan, Dropbox gives you 2 GB of data server space for your needs.
After filling out the registration card and selecting a tariff plan, you will be redirected to the site where the Dropbox download will begin.  The application is being installed. If you do everything correctly, after installation is complete you will be redirected to the Dropbox login page.
Enter the email address specified during registration, password and click login.  Click open Dropbox folder. A message appears in the tray indicating that you are connected to the Dropbox system. Click on the tab and select open folder.
  Once you've opened the folder, you'll find instructions and a guide on how to get started using Dropbox. Try dragging a few photos or documents into the Dropbox folder. Then open the Dropbox website at
Dropbox is the world's first and by far the most popular cloud storage service. This is a service through which each user can store any data, be it multimedia, electronic documents or anything else, in a safe and secure place.
Security is by no means the only trump card in Dropbox's arsenal. This is a cloud service, which means that all data added to it ends up in the cloud, remaining tied to a specific account. Files added to this cloud can be accessed from any device on which the Dropbox program or application is installed, or by simply logging into the service website through a browser.
In this article we will talk about how to use Dropbox and what this cloud service can do in general.
Installing this product on a PC is no more difficult than any other program. After downloading the installation file from the official website, simply run it. Next, follow the instructions; if you wish, you can specify the location for installing the program, and also specify the location for the Dropbox folder on your computer. This is where all your files will be added and, if necessary, this location can always be changed.
Create an account
If you still don’t have an account in this wonderful cloud service, you can create one on the official website. Here everything is as usual: enter your first and last name, email address and come up with a password. Next, you need to check the box, confirming your agreement with the terms of the license agreement, and click “Register”. That's it, your account is ready.

Note: The created account will need to be confirmed - a letter will be sent to your email, the link from which you will need to follow.
Settings
After installing Dropbox, you will need to log into your account, for which you need to enter your username and password. If you already have files in the cloud, they will be synchronized and downloaded to your PC, but if there are no files, the empty folder that you assigned to the program during installation will simply open.
Dropbox runs in the background and is minimized to the system tray, from where you can access the latest files or folder on your computer.

From here you can open the program settings and make the desired settings (the “Settings” icon is located in the upper right corner of the small window with the latest files).
As you can see, the Dropbox settings menu is divided into several tabs.

In the “Account” window, you can find and change the synchronization path, view user data and, most interestingly, configure synchronization settings (Selective Synchronization).

Why is this necessary? The fact is that by default, all the contents of your Dropbox cloud are synchronized with your computer, downloaded to it in a designated folder and, therefore, take up space on your hard drive. So, if you have a basic account with 2 GB of free space, this most likely does not matter, but if you, for example, have a business account with up to 1 TB of space in the cloud, you are unlikely to want the entire this terabyte also took up space on the PC.

So, for example, you can leave important files and folders synchronized, documents that you need to have constant access to, but not synchronize bulky files, leaving them only in the cloud. If you need a file, you can always download it; if you need to view it, you can do this on the web by simply opening the Dropbox website.

By going to the “Import” tab, you can configure the import of content from mobile devices connected to a PC. By activating the camera upload feature, you can add photos and video files stored on your smartphone or digital camera to Dropbox.
Also, in this game you can activate the function of saving screenshots. The screenshots you take will be automatically saved to the storage folder as a ready-made graphic file, to which you can immediately receive a link,

In the “Bandwidth” tab, you can set the maximum allowed speed at which Dropbox will sync added data. This is necessary in order not to load the slow Internet or simply to make the program work unnoticed.

In the last settings tab, you can configure a proxy server if desired.
Adding files
To add files to Dropbox, simply copy or move them to the program folder on your computer, after which synchronization will begin immediately.

You can add files both to the root folder and to any other folder that you can create yourself. You can also do this through the context menu by clicking on the required file: Send - Dropbox.

Access from any computer
As mentioned at the beginning of the article, files in cloud storage can be accessed from any computer. And to do this, it is by no means necessary to install the Dropbox program on your computer. You can simply open the official website in your browser and log in to it.

Directly from the site you can work with text documents, view multimedia (large files can take a long time to load), or simply save the file to your computer or a device connected to it. The account owner can add comments to Dropbox content, link to users, or publish these files on the web (for example, on social networks). 
The built-in site viewer also allows you to open multimedia and documents in viewing tools installed on your PC.

Access from a mobile device
In addition to the computer program, Dropbox also exists in the form of applications for most mobile platforms. It can be installed on iOS, Android, Windows Mobile, Blackberry. All data will be synchronized in the same way as on a PC, and the synchronization itself works in both directions, that is, from a mobile phone you can add files to the cloud in the same way.

In fact, it is worth noting that the functionality of Dropbox mobile applications is close to the capabilities of the site and in all respects is superior to the desktop version of the service, which is essentially only a means of access and viewing.

General access

Note: If you want to allow someone to view or download a particular file, but not edit the original, simply provide a link to the file rather than sharing it.
File sharing function
This possibility follows from the previous paragraph. Of course, the developers conceived Dropbox solely as a cloud service that can be used for both personal and business purposes. However, given the capabilities of this storage, it can also be used as a file sharing service.

So, for example, you have photos from a party at which there were many of your friends, who, naturally, also want these photos. You simply give them general access, or even provide a link, and they already download these photos to their PC - everyone is happy and grateful to you for your generosity. And this is just one of the application options.
Dropbox is a world-famous cloud service for which you can find a lot of use cases, not limited to what its authors intended. This can be a convenient storage of multimedia and/or work documents, aimed at home use, or it can be an advanced and multifunctional solution for businesses with large volumes, work groups and extensive administration capabilities. In any case, this service deserves attention if only for the reason that it can be used to exchange information between different devices and users, and also simply save space on your computer’s hard drive.
There are quite a lot of services on the Internet that claim to have the same functionality as Dropbox. Take ZumoDrive, Live Mesh, SkyDrive, Ubuntu One or SugarSync. There are many of them, but today we will talk about exactly that - everything has its time, and you can’t grasp the immensity, but you need to try. In addition, Dropbox is interesting because it is easy to use, the interface is intuitive, and the service itself is free to a certain level. So let's begin.
Dropbox - what is it and what is it for?
is a cloud-based information storage system in the form of folders or files. That is, you store files not on your computer, but on a third-party service. You can do this for free up to 2 gigabytes, or increase your storage capacity by connecting your friends to the service with referral links. For each new user you will receive 125 additional megabytes of storage. Up to 100 gigabytes of additional storage can be obtained for an additional fee. Using the Dropbox cloud, you can synchronize files, for example, between a home group of computers. For example, I now have 4 computers in operation, and Dropbox is installed on all of them. Therefore, having put files on one PC in the cloud, I can immediately see them on another. Well, use them, of course. In general, this service has so many features that they cannot be contained in one article. So I'll start from the very beginning and we'll gradually move forward, exploring our Dropbox.
Nowadays, many users work every day on several computers at once. For example, there is one PC at home, another at work, there is also a laptop or smartphone, and maybe also a tablet. In this case, it becomes very difficult to synchronize data - the necessary files have to be sent by email many times, use ISQ or Skype, connect USB drives or copy everything to disks. It’s inconvenient and long, you’ll agree.
Compact hard drives and USB drives solve this problem, but only partially. And do they decide? You can forget a flash drive at home or even lose it, and they often break. And the information on it can be very valuable and necessary. Storing information on the Internet is the safest solution. And this method of storage makes your existence significantly easier - you don’t need to worry about extraneous things, you just know that you have your own personal chest online, in which everything is safely hidden and will not go anywhere.
- one of these modern “chests”. It is designed to store information in any form with the ability to synchronize data between MAC, PC and all kinds of mobile devices. Dropbox is extremely easy to use and manage - you don't need a lot of knowledge to get started. As I already mentioned, it supports any file format. Dropbox allows you to work with a large number of folders and files at once. Dropbox can be installed on any operating system, and it will get along perfectly between them. For example, you have a MAC at home, Windows at work, and an iPad for travel.
You can still easily work with any files on any device, transfer them, change them, or even delete them. You can publish files to the Internet from any computer. If you update a file on your PC, it is automatically updated on the Internet. Supports collaboration between multiple users - to do this, you just need to create one shared folder, and other documents will not be visible to this group of users. If files are changed by one user, then for other users they change automatically, and a service message appears on the computer about updating the information.
Updating program versions and the ability to return to previous versions also exist. With Dropbox, you can share email or any other information across multiple devices over Wi-Fi. For example, if you need to synchronize iPhone, MAC and PC without connecting to a computer. Even an inexperienced PC user can easily figure out how to work with Dropbox. You and I will figure it out too.
First, download the client from this link - and when installing the program, in the input field, enter your registration data that you entered when registering on the site before downloading https://www.dropbox.com. After this, you will have a folder on your computer called “Dropbox”. Now all the information that will be placed in this folder can be synchronized between the Dropbox cloud and any of your computers. Now I will tell you in detail, in detail and with pictures, how to easily and quickly install the Dropbox program on your computer and launch it. Let me remind you once again that special versions of the program have been developed for any operating systems and mobile devices. Now download our client for PC on Windows:

When installing the program, it will ask if you have an account or if you are a new user. Select the item “I don, t have a Dropbox account”.

Although Dropbox has been working for me for a long time, as an example I will delete the old program and install it again with a new Dropbox account. At the same time, I do not risk anything, since all my files and folders in Dropbox on the computer are also on the server, and they will remain safe and sound. In this window you need to fill in all your data that you entered during registration. Write a correct and working address, because your new account will be linked to it.

Now choose your storage capacity. As you can see, you will need to pay for more than 2 gigabytes, so choose 2Gb - it will be enough for you for the first time. I chose a free “chest” of 2Gb size:

When installing the Dropbox program, you can specify the directory in which all your synchronized folders and files will be located, or you can leave everything by default - then the program itself will create a folder in “My Documents\Dropbox”. The folder will look like the Dropbox service icon. A Dropbox icon will also appear in the tray, which will look like this:
And inside your “Dropbox” folder there will be folders and files that will relate to the service, as well as your folders, which you can rename as you wish. You see that by default several folders are created - “Photos”, “Camera Uploads” and a service file with its description. You can definitely remove it, and do with the rest as you please. I removed all the unnecessary folders and created several new ones - for myself, for my computers, and several for friends.

If you want to work with files on other computers or devices, then go to the site . There you can work with documentation in the same way as on a computer, upload new files or download old ones in protected mode. There is also the ability to share folders with other users in your Dropbox app.
How to Create a Shared Folder for Other Dropbox Users
The “Dropbox” item will appear in the Explorer context menu, in which you will see what additional things you can do with folders and files. And for public access, you will need to install Dropbox on another computer, indicate your current account, and get all the current copies of the cloud. Folders and files will be synchronized automatically. Sharing in Dropbox allows you to share information in your cloud with friends, colleagues and other users.

Now all the information that is in the Dropbox folder can be synchronized between the Dropbox cloud server and any of your (or not your) computers. Data transmission occurs via an SSL connection and is encrypted using the AES-256 algorithm. All this happens in the background and does not disturb you in any way. That is, you will have the most convenient and secure access to folders and files, both from your home computer and from your work PC or from a mobile device (tablet, phone). It's easy to record some information in the storage: just drag and drop the files into your Dropbox folder on your personal computer and wait for them to download. For example, I transferred an image file weighing 1.4 GB in this way, and this process took me 10 minutes.
To allow other users to work with shared files and folders, you can create a separate folder. For example, "Friends". Now you must right-click on it and select “Dropbox/Share this folder”. In the browser window that opens, enter the email address of the person with whom you want to share this folder. When he receives the invitation by mail and accepts it, the operation can be considered completed. Now you can share files quickly and securely.

You can simply copy this link and send it to your friends by email, but why bother if Dropbox does everything for you? You must select this item in the computer context menu (image below) to send the link to your friends:

This is what the invitation window with link will look like in your browser:

Now that everyone sharing the folder can work with this folder, you can change its contents, and other connected users will immediately see the changes. Immediately - because they will receive a pop-up notification from Dropbox on their computer that an update has occurred in such and such a file. Additionally, you can manage who has access to the shared folder, even to the point of deleting them by deleting files on their PC or mobile device.
So that you can share Dropbox, you can use another method. You need to send invitations to friends or colleagues by email, but only under one condition - they must have Dropbox installed. This can be done quite simply - in the same window (picture above), click the “Import contacts” link. Your mailboxes and services in which you participate - Gmail, etc. will appear in the window that appears. Write the text of the invitation, by accepting which your friends will be able to access the files and be able to work with them. Moreover, all changes will be visible to all other users of this shared folder in Dropbox.
We draw promising conclusions - all folders and files that are stored on the Dropbox server can be downloaded to your computer at any time, sent to other users, or simply changed something in them. Moreover, you can always get backup copies of all documents or restore previous, unaltered versions of documents! Handy if you unintentionally deleted or changed a file. With free access (up to 2 gigabytes), users can restore previous versions of files for the last month, and premium users can do this for any time. That is, when using a paid account, you can get any copy of your entire computer if you copy all the files and folders on your computer to Dropbox in advance. You can delete files and folders without the possibility of restoring them. But there are limitations here too, albeit rather funny ones. You cannot delete several files or folders at the same time - only one at a time. And you cannot delete a folder if it contains more than 1000 files. That is, all this is conditional and solvable.
Access Dropbox from mobile devices
As I said above, your Dropbox account can also be accessed from mobile devices, for example, from Android smartphones, iPhone, iPad or Balckberry. What you can do in Dropbox on your mobile device:

1. View the complete list of files in your Dropbox account.
2. View some types of files on a mobile device (docx, txt, pdf, jpg, avi - and almost all formats and extensions) open on my tablet.
3. Add video files, images and photos for synchronization. On Android, you can easily work in Word and save files to Dropbox.
4. Create new directories and folders.
5. Save any available files to other applications.
Security in Dropbox
The Dropbox cloud service takes care of the security and confidentiality of all your data. Here are the measures that have been taken for the security and preservation of information:
1. All information passes through a secure SSL connection.
2. Information is stored on the server in encrypted form (AES-256), and Dropbox personnel do not have access to other people's files. At least that's what the company claims.
3. Only users who have received an invitation can access public folders.
4. Only users who have a link to the file can access files in the shared folder. It is not possible to view the entire folder or other files in this directory.
5. All Dropbox applications are protected to the maximum extent possible.
That is, when using the cloud service, you have comfortable, fast and completely secure access to information from any computer or mobile device that is connected to your account. The big advantage of Dropbox is that it is easy to use even for an untrained person, and the entire procedure for communicating with this application is simplified as much as possible. Complex and lengthy settings are completely eliminated.
What does LAN Sync do?
Not long ago, Dropbox introduced a new feature - “LAN Sync”. It makes it possible to synchronize files on corporate local networks, without the participation of the Dropbox server. This function greatly increases the speed of data transfer and information synchronization within the network. If previously changes to files and folders went through the Dropbox server, now they first check for the presence of a changed file on the local network, and then this file is downloaded. That is, the width of the external server channel no longer affects the speed of the application.
Addition DropboxPortable organized with the purpose of not just replacing a USB drive, but can also serve as its addition. This application works from a flash drive without installation. You can synchronize all files and folders to this flash drive. The only but significant drawback is that it is still a beta version, so it does not work very stably.
If, due to your line of work, you constantly exchange files between different computers, then Dropbox is an almost ideal solution for organizing such a function. Regarding additional disk space, you can get an additional 250 MB (I already wrote) for data storage by following a few points from the list for dummies. This will give you Dropbox Guru status. I completed all these points easily, since I have several computers, and I have accounts on both Facebook and Twitter, where 250 MB are also added for publishing a Dropbox link.

Dropbox is a cloud data storage system. Using this service, we can store our data on the company’s remote servers and access it from any computer and other devices, such as iPhone. We can also easily share these files with other Internet users. For example, I use Dropbox to access my data, both from other computers and from my laptop and phone.
To interact with your files that are in the cloud on Dropbox, you will only need to know your username and password to access them from any computer by simply opening the site in a browser. For convenience, there are also programs and applications for computers and smartphones.
Dropbox Cloud provides the user with 2 gigabytes of data storage for free. This limit can be expanded to 16 gigs by simply inviting other users to the Dropbox system. If I'm not mistaken, then for each attracted user we are given an additional half a gigabyte. That is, you need to attract about 28 people to increase the disk space on Dropbox to 16 gigabytes for free. Well, then, more is already paid. Today we will look at the free option.
Let's get started Dropbox registration.
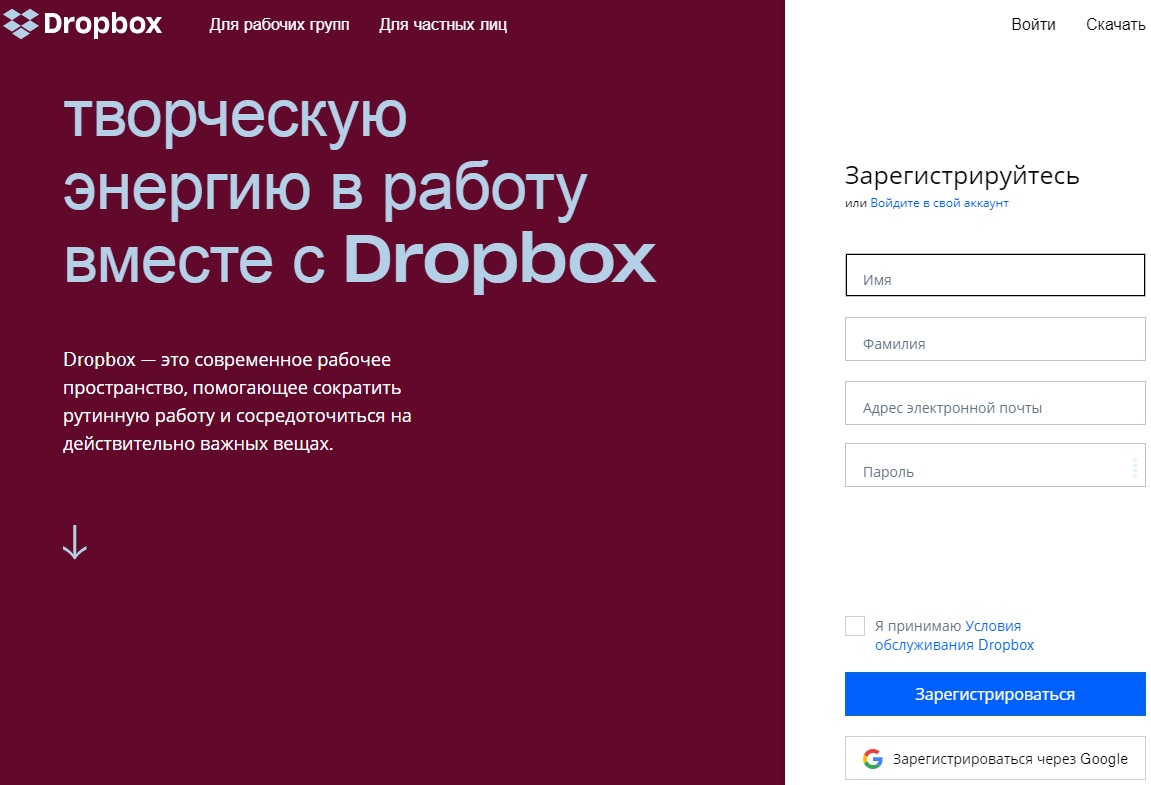
Go to the official website: https://www.dropbox.com.
Everything here seems to be in English, but fortunately everything is clear even to those who do not know foreign languages. Enter your first name, last name, email address and create a password. We accept the terms of the agreement by checking the “I agree to Dropbox Terms” checkbox. Click the “Create account” button.

The account has been created. Immediately after this, the download of the program begins, select the location on the computer where you would like to download it and click the “Save” button.

If suddenly the download does not start, then you need to click on the restart the download link to re-download.

So, we downloaded the program, now let's install it. Launch the downloaded file.

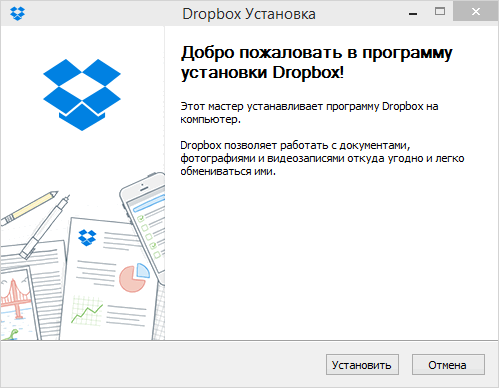
In the window that opens, click the “Install” button.

Dropbox installation has started, we are waiting...

When the installation of the program is complete, we will be asked to choose one of two options. The first is for those who do not yet have their own Dropbox account, and the second is for those who already have one. We already registered with Dropbox, so we set it to switch to the second mode " I already have a Dropbox account" and click the "Next" button.

Enter your data, email and password that you specified during registration and click “Next” again.


In the next step we need to choose which settings we want to use, we will leave the recommended ones. Click “Install”.

Now in five steps the program will introduce us to the capabilities of the program and how to use it correctly.
In the first step, we are told that a folder will be created on the computer where all the files will be stored. Everything we place here will be automatically copied to the server, and we will be able to access synchronized files from any computer. A little further we will change the location of this folder.

In the second step we are told that we can also access our files through any browser. We are not limited to just one program. Next, let's look at how this is done.

In the third step, we are shown that an icon will “hang” in the Notification Area.

Using it, we can easily access the program; it runs along with the computer.

The fourth step says that we can give other users access to download our files, which are in our Dropbox folder and are already synchronized with the server.

And the fifth step is final, here we have a checkmark in the “Open my Dropbox folder now” mode, which means open my Dropbox folder with files. Click "Finish".

The Dropbox folder opens, where we will place all the files so that they are stored in the “cloud”, that is, not only on our computer, but also on remote Dropbox servers. There are standard files here that can be safely deleted.

This folder is stored on the system drive by default, not a very suitable place. I suggest changing it to a folder on another disk. To do this, click on the program icon, in the window that appears, click on the tools icon and select “Preferences” from the drop-down list.

Go to the “Advanced” tab and click the “Move” button here.

We select a location on the computer where our files will be stored. I'll select the drive (E:) and the "EveryDay" folder. In it, the program itself will create a Dropbox folder, where it will move all the files that are already in the cloud storage. Click "OK".

We confirm the movement and storage of files in the specified folder.

The folder is selected, click “OK” again to save.

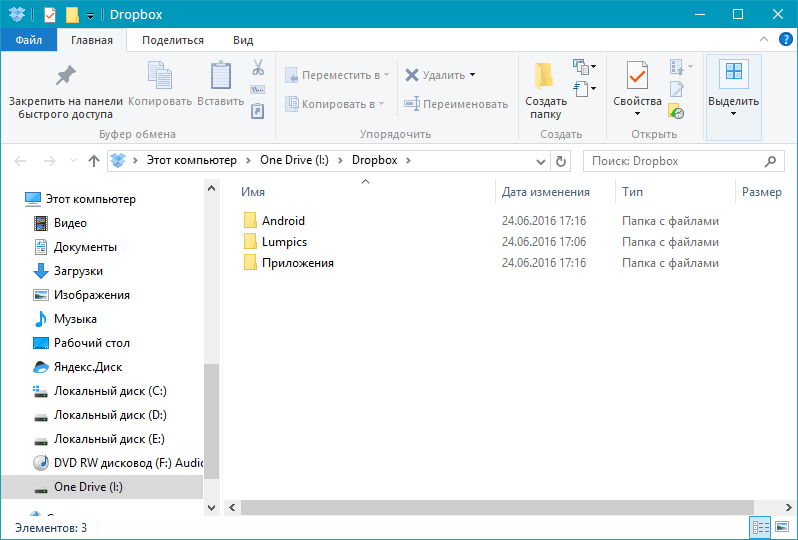
If I now go to the My Computer drive (E:) in the EveryDay folder, I will see Dropbox there.

And if I go inside, I’ll see files there. Now I'll try to throw something else in there. I would like to note that the files with green checkmarks are already synchronized and will be accessible from any computer. And those files that have a blue icon next to them, in my case this is the “About School” video, are still being uploaded to the server, and if we want all the files to be accessible from different devices: PC, laptop, phone, then we need to wait for complete synchronization.

Well, all the files that I uploaded to the Dropbox folder have already been copied to the server, and I can now access them from any PC. Now I showed you all the operations from my laptop, now I’ll try to move to my desktop computer. I’ll install the Dropbox program there and enter my username and password. In general, I do everything as described above, but I don’t register anymore, since I already have an account in Dropbox.
I launch the program, log in by entering my username and password. Now I’ll wait until the files are synchronized, about 5 minutes if there are not many of them. I go to the default Dropbox file storage folder and see that I have all the same files there that I uploaded on my laptop.

I can also access my files from any computer without installing Dropbox. To do this you need to use any browser.
Go to the site http://www.dropbox.com, click on the link in the right corner of the Sign in site, and in the form that appears, enter your login (mail) and password and click on the Sign in button.

The page loads, where we see our files again.

Having this like this Dropbox account, we can upload files and have cloud storage of our data and access them at any time, without having to constantly carry flash drives, etc. The main thing is to remember your username and password.
You can also access your files from your smartphone. I'll show you using an iPhone as an example. Install the Dropbox applications on it, launch it, click the “I’m Already Dropbox User” button.

Enter your username and password and click Sign in Dropbox.

Here we click Cancel.

And here are our files again, only here they are not synchronized to our device, but simply available for reading.

That is, we simply see the files that are in the cloud (on the server), and if we want to open one of the files, then yes, in this case it will first be downloaded to our device and then open.
That's it for me Dropbox lesson I’m finishing up, if you have any questions, ask them in the comments.
DropBox is an online file storage program.
The advantage of storage is that if there is not enough space on the hard drive for new files, upload existing ones to the Internet and then delete the files from the computer.
Essentially, file storage stores user information so that he can later use it or so that he can transfer his files to other users of the World Wide Web.
At the same time, they supposedly expand the user’s hard drive, but this is not entirely true.
Moreover, in order to receive a file, you first need to download it from the Internet, and in order to have something to download, you need to upload the file to the Internet even earlier. But all this is the Internet - it wastes traffic...
Many companies provide their users with a completely free small “disk”. The DropBox site has 2 GB.
However, it can be expanded up to 1 TB by completing various site tasks and paying money to increase the space provided.
The history of Dropbox

The program was invented by DropBox back in 2007 and then began to develop. This program has come to many platforms such as Android, Windows, Linux, Windows Phone, iOS, Blackberry and Bada.
The idea for the project first came to Drew Houston while he was riding on a bus.
According to the Internet, one day he got on a bus, and it was a long way to go.
So that he would not be bored, he took his laptop with him, but forgot to take the Flash drive with him.
He considered that for all people it would be necessary to come up with a program that would not require additional storage media such as floppy disks and disks.
His choice fell on the Internet and he began writing the first version of the DropBox program on a laptop while sitting on the bus.
Subsequently, the program was approved and began to be praised. The DropBox company was created and a domain was assigned to it https://www.dropbox.com/.
It is also known in history that on June 19, 2011, any Internet user could see the files of other people’s users within 4 hours and easily download them to their computer.
Depending on the version of the program and operating system, the controls are different.
The article will discuss the application for Windows and Android.
Dropbox for Android
First of all, you need to open Google Play Store on your phone.
An Internet connection is required.

After the Play Market is selected (colored triangle, for some it may be a white briefcase), the Play Market window itself will open.
To do this you need to do the following in order: Login with Google.


Once login is allowed, a menu will appear.
What can be done with it is indicated in the figure.

To download new files, you need to close the menu by clicking on the gray area.
Then you need to click on the blue circle with the “+” sign.
Internet traffic is used to upload and download files.
The figure shows a gray gear - a button to go to the settings menu.

In “Account Photos” you can change your photo (avatar).
It will be visible to other users.
The Dropbox Basic plan is free but has the fewest features.
To view the available plans, click on “DropBox Basic”.
Connecting a computer is an offer to install the program not only on a smartphone, but also on a computer.
The logout button allows you to log out of your account.
If you log out, you will need to log in again to view the files.
For inviting friends, you can increase the size of your storage for free.

If you uncheck notifications, the user will not know about DropBox news, downloading and changing their files, etc.

By clicking on the access code setting, the user can increase the security of his data on his account by coming up with a personal code that only he will know.
In updates you can see how there are new versions of the program.
The cache clear button will free up some space on your smartphone, but next time you will have to log into your account again.

The “Application Version” shows the current version – 48.2.2. Versions are updated over time.
They can be viewed and downloaded by clicking on the “Latest Updates” button.
In the help center you can get answers to questions about the program, and in the “legal information” you can find the terms of use of the program.
Dropbox for desktop
First you need to go to the company’s website https://www.dropbox.com/.
Then you need to click on the “Download” button.

A download window will appear. At the bottom left it will tell you how soon it will load.
After downloading, you need to click on the downloaded file.

We must agree.

Windows may also display a User Account Control window.
There you also have to agree.
The installation window will open.

After initialization, the program will download the program from the Internet (from the official website).
The download speed depends on the telecom operator tariff chosen by the user.
You need to wait for the download to finish.


After installation in the menu "Start" the program will appear, and the program itself will display a login window.
To begin with, it will show you how to register.
To do this you need to press the button "Register".

After opening the appropriate window, you need to enter your data in the fields and register.
Only after registration you will be able to use the service.
If desired, the program can be removed by clicking "Start" - "Control Panel" - "Remove programs".
Therefore, a step-by-step guide to the program on Windows is not possible.
Instead, the site itself will certainly be used.
Using Dropbox online
To begin, you need to log into your account on the official website.
Then the page will open (if you log in for the first time).

After clicking on the “Show me how it works” button, the service will try to teach the user the basics of using the storage.
To complete the full training (it is absolutely free), you need to click the “Next” button.
You can skip the tutorial by clicking the button "End review".

The user can expand the functionality of his disk by clicking on the button "Improve your account".

After clicking, the user will be given a page where he can choose a tariff plan.

After selecting (the “Start” button), the browser will open another page.

Once selected, the user will be redirected to the purchase confirmation page.
You need to be very, very careful on it.
All instructions are written in red text on the image.
You also need to select a country and enter its index.

After pressing the button "Buy now" a purchase will be made.
The figure shows an example of payment via the PayPal electronic payment system.

When making a purchase, you usually receive an invoice notification on your mobile phone and a one-time password to complete the purchase.
But this is all just additional and not necessary.
Let's go back to explaining the interface.
There is a face on the page.
If you click on it, a window will open for you to upload your photo.

It can be changed at any time.

There is a blue button on the home page "Download files".
Clicking on it will open a file selection window.
In the desired folder, you need to select the desired file with the mouse and click “Open”.
After the file is uploaded to the server, the download status will be displayed at the bottom of the page.

After downloading the file, you will be asked which folder on the server to save the file to.
Initially, only one folder is provided, named "DropBox".
To save, you need to select the desired folder with the mouse and click on the “Download” button.

You can also find the downloaded file among others simply by entering its name in the search bar.
By clicking on a file, the service will automatically redirect the user to view the file.

In the “Files” menu, all downloaded files are not only displayed along with icons, but you can also see how long ago they were downloaded (the “Changed” column).
There is a submenu in "Files" "General access", where you can view and download other users' files, but you must first verify your email address.
You will receive an email from DropBox containing a confirmation link.
To confirm your email, just go to it by clicking on it.
The operation is performed once.

Just like any file storage, it is possible to delete your files.
On DropBox, deleted files can be recovered within a month without uploading them to the server.
If a month passes, in order to restore the file, you will have to upload it to the server again.


