Windows 7 data recovery program. How to recover files deleted from your hard drive. Recovering deleted files from the Recycle Bin
When an important file is lost, a document you spent a week on is erased, and photos disappear from a suddenly formatted memory card, there is no need to worry ahead of time. When you delete a file from the disk, its description in the system is erased. The set of bytes that made up the file remains in place until something else is written on top of them. So you can try to recover your data using any of these applications.
Be careful if you install applications on a drive where deleted files were located. There is a risk that application files will be overwritten during installation. It is better to select another partition or physical disk for installation.
Platform: Windows.
Price: free, $19.95 for premium version.
Recuva can recover data lost by mistake, for example from an accidentally emptied Recycle Bin. The program can return photos from an accidentally formatted memory card in the camera or music from an empty MP3 player. Any media is supported, even iPod memory.
Platform: Windows, Mac.
Price: free, $89 for premium version.

Disk Drill is a data recovery application for Mac, but there is also a version for Windows. This program supports most types of disks, files and file systems. With its help, you can restore erased files using the Recovery Protection function, as well as find and clean the disk. However, the free version does not allow you to recover files lost before installing Disk Drill.
Platform: Windows, Mac, Linux, FreeBSD, OpenBSD, SunOS, DOS.
Price: for free.

A very functional and versatile open source application. It has a text interface, but it is not difficult to understand.
TestDisk supports a huge number of file formats. In addition, the program can be burned to a LiveCD to recover data from a disk on which the system does not boot. The utility can recover a damaged boot sector or lost data.
TestDisk comes with the PhotoRec program, which recovers erased files, photos, music and videos.
4. R-Undelete
Platform: Windows, Mac, Linux.
Price: the free version recovers files up to 256 KB in size; $79.99 for full version.
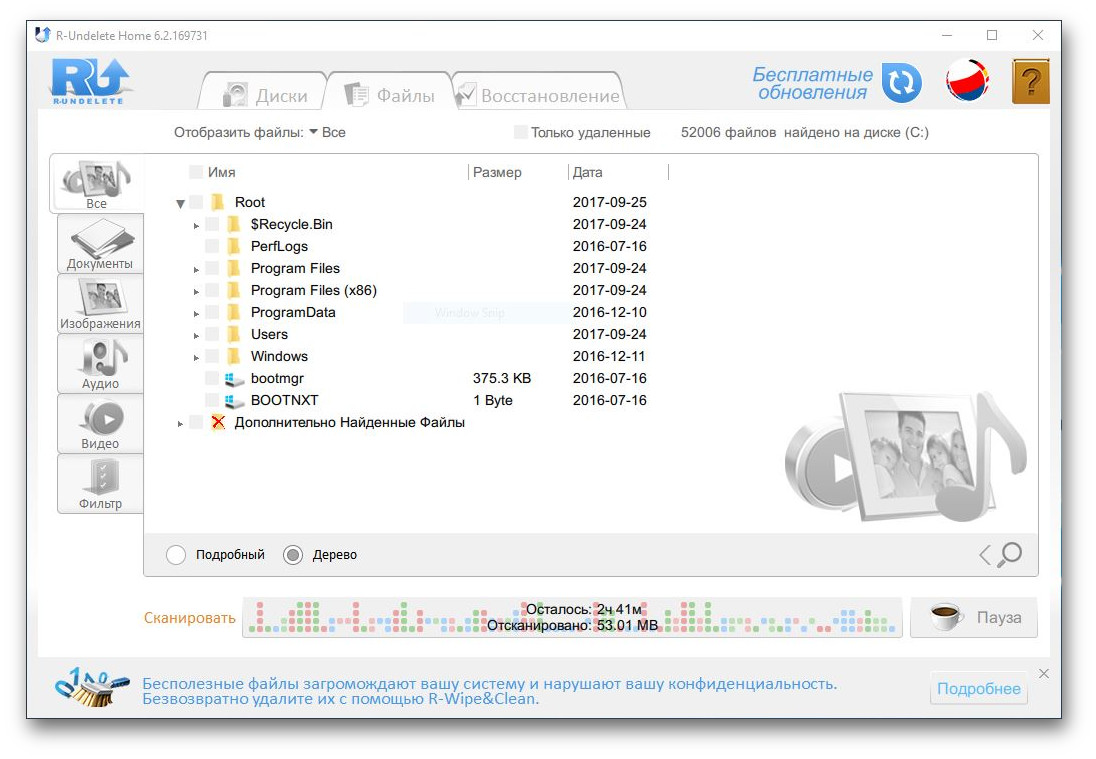
R-Undelete is part of R-Studio. This is a whole family of powerful data recovery programs. Supported file systems are FAT12/16/32/exFAT, NTFS, NTFS5, HFS/HFS+, UFS1/UFS2 and Ext2/Ext3/Ext4.
R-Studio applications can recover deleted data both on local drives and over the network. In addition to data recovery, the utilities provide tools for advanced partition copying and searching for bad blocks on disks.
Platform: Windows.
Price: free in trial mode with recovery of up to 1 GB of data; $69.95 for full version.

Eassos Recovery recovers deleted files, photos, text documents and more than 550 file formats. The application has a very simple and intuitive interface.
Platform: Windows.
Price: the free version does not save found files; $37.95 for full version.

The Hetman developer provides a set of utilities for recovering various types of data: entire sections or individual photos and documents. The program supports all hard drives, flash cards, SD and microSD.
Platform: Windows.
Price: free, $19.97 included with Glary Utilities.

Glary Undelete can recover any deleted files, including compressed, fragmented or encrypted ones. Filtering of recovered data is supported.
Do you know more convenient and functional data recovery applications? Tell us about them in the comments.
Restoring system files in Windows 7 or Windows 8/8.1 is an interesting topic. Especially if the operating system starts to fail, but we don’t have a recovery image and we forgot to turn on system protection so that recovery points can be created. In this case, we will not be able to restore the system from the image, we will not be able to roll back Windows to the created restore point, and we are also too lazy to reinstall the system, since this will take the whole day. And right here we have another chance to return Windows to normal - try to restore system files. In this article I will try to fully cover the topic so that we can revive our computer in any situation.
1. Recovering system files on a busy system
If our computer somehow turns on, then we do the following. (if it does not turn on, see section 2 of this article)
Open the Start menu. In the search field we write “Com”. On the element " Command line"Right-click and select " Run as administrator»

In the command line that opens we write
sfc /scannow
We wait a little
If your system is ok, you will see the following image

If your Windows was broken, you will see the following

System files were successfully restored. We reboot and immediately turn on system protection to create restore points so that next time we can simply roll back the state of the computer to a couple of days ago and that’s it.
It happens that when scanning the system, the sfc.exe utility found damaged files, but could not fix them. In this case, I would restore system files in Safe Mode. If the same thing happens in safe mode, read the last paragraph 4 of this article.
If your computer does not boot at all, as discussed at the very beginning of the article, then read the next paragraph.
If our computer does not want to boot at all, then we use the recovery environment. You can load into it:
- Pressed when turning on the computer F8 repeatedly
- Booting from a boot (installation) disk or flash drive
The first option will work if we have a boot partition that the system created when partitioning the disk when we installed the system. Boot partition size:
- Windows 7 - 100 MB.
- Windows 8 - 350 MB.
In any case, try pressing F8 several times during boot. A window should appear with additional download options. Choose Troubleshooting computer problems.
In the next window, select the keyboard input method. Select the language in which you have set the administrator password (if there is no password, you can immediately click Next >).
Select a user with administrative rights and enter a password if you have one. If there is no password, just click OK.
Select the command line.
If you are unable to enter the recovery environment using the F8 key, you will need to boot from the installation (bootable) flash drive or disk. You can boot from disk in the same way. Only in this case you need to put the DVD-RW (optical disc reader) first in the boot priority.
I like to boot from removable media using the boot menu. On ASUS motherboards it is usually also called by the key F8.
After booting from a flash drive or disk, I saw the following picture. I choose Windows Setup- Windows installation.
We wait until all installed Windows are found.
We choose the one that does not turn on for us. And here CAREFULLY! We remember the letter that the recovery environment assigned to your system (in the Folder column). I have this D.
Select Command Line.
Enter the command
sfc /scannow /offbootdir=D:\ /offwindir=D:\windows
Instead of D, you substitute your letter. Press Enter and wait for the scan to complete
The virtual machine from which the screenshot above was taken had a blue screen, so I was not surprised that system files were found and restored.
3. How to find out the drive letter with Windows installed
If you succeed using the key F8 call up the “Advanced boot options” window and select “Troubleshoot computer problems”, then we need to find out the drive letter where Windows is installed that was assigned by the recovery environment. This can be done in two ways
1. Call the notepad with the command
Open menu in notepad File and choose Open…
Left click Computer and in front of you there will be disks with letters.
You can go to the disk and make sure what and where.
2. Use the utility DISKPART
On the command line enter:
diskpart- call the utility for working with disks.
list disk- look through the list of disks.
select disk- I select the hard drive I need.
detail disk- I call up information about this disk.
4. For Windows 8/8.1
If the sfc utility was unable to restore damaged system files, then you need to try to restore the storage of these system files. The place where copies of working system files should be located. As I understand it, it is located at C:\Windows\WinSxS. That is, we must first fix the file storage, and then use the “SFC / Scannow” command to restore Windows system files.
4.1. Recovering storage using Windows Update
1. Launch Windows PowerShell with administrator rights. To do this, open the Start menu or home screen and click on the “Search” icon. In the search box we write “PowerShell”. Right-click on “Windows PowerShell” and select “Run as administrator” or “Run as administrator”.
2. In the window that opens, write
Dism /Online /Cleanup-Image /RestoreHealth
and wait. If the storage is intact or it was restored using Windows Update, you will see the following picture.

If Image Health State: Healthy - everything is fine. Reboot the computer and try SFC /SCANNOW again.
4.2. Restoring storage using an image
If we have problems with Windows Update, then this method will do.
1. Download the original Windows 8/8.1 image of the same bit size as your system. How to find out the bit depth of the installed system - .
2. Connect or mount the downloaded image. Right-click on the image and select “Connect” or “Mount”.

3. In the command line with administrator rights, we look at what editions there are in the image with the command
Dism /Get-WimInfo /WimFile:F:\sources\install.wim
I have 2 editions in my image. It’s hard to understand which one I need based on these distinctive signs. Let's use the first one. If it doesn’t work, the second one.
4. Launch Windows PowerShell with administrator rights and set the command
Repair-WindowsImage -Online -RestoreHealth -Source F:\sources\install.wim:1
where F is the drive letter to which we connected the image, 1 is the Windows edition number in the image.
5. Recovering system files manually
If using the sfc utility it was not possible to recover damaged files, you need to try to do it manually. In this case, you need to additionally run the command
findstr /c:"" %windir%\Logs\CBS\CBS.log >"%userprofile%\Desktop\sfcdetails.txt"
Findstr/c: ""%Windir%\Logs\CBS\cbs.log>sfcdetails.txt
and carefully study the file sfcdetails.txt on your desktop or %windir%\Logs\CBS\.
It should be something similar to the picture below.
After the name of the damaged file is known (Accessibility.dll), we look for it on another computer with the same system as yours. If this is not an option, then I would download the original Windows image and install it on the virtual machine. I found the file I needed and copied it to a bootable or installation flash drive. Then, from this installation flash drive, I booted into the recovery environment and launched the command line. From the command line I would open notepad. I opened the menu File > Open - and now I have an almost full-fledged explorer. We copy and replace the working file from the flash drive, reboot and everything should work.
If the option of installing a virtual machine does not suit you, then you can include the install.wim file in the folder. Then go to this folder and copy the necessary files.
1. Create a folder. For example, “Win8.1Pro” in the root of drive D.
2. Copy the install.wim file to the root of drive D.
3. Mount the install.wim file into the created folder.
Dism /Mount-Wim /Index:1 /WimFile:D:\install.wim /MountDir:D:\Win8.1Pro
Go to the created folder and copy the necessary files.

Disable the image
Dism /Unmount-Wim /MountDir:D:\Win8.1Pro /Discard
Read, how to recover files in Windows. Let's consider reasons for losing files and ways to recover them, using standard system tools and third-party data recovery programs. Modern computer devices have a wide range of applications and are presented today in different types: stationary personal computers, laptops, netbooks, ultrabooks, tablets, smartphones, etc. Each device is a complex electronic mechanism designed to solve specific problems and used by users in different situations.
Content
Introduction
Modern computer devices have a wide range of applications and are presented today in different types: stationary personal computers, laptops, netbooks, ultrabooks, tablets, smartphones, etc. Each device is a complex electronic mechanism designed to solve specific problems and used by users in different situations.
Personal computers and laptops have comparable functions, allow users to solve almost any task and store a significant amount of data.
Netbooks are modest in size, but they offer laptop-like capabilities and offer a convenient way to surf the web. "Internet". Ultrabooks have a thin design and light weight, which greatly improves their convenience for remote use.
Smartphones are created mainly for communication, both direct, through communication, and remotely, through various social networks and mobile applications. Additionally, like tablets, they help users receive, process and send their email, view any web page in "Internet" and serve for games and entertainment.
However, the main task of each device is to process, exchange and store user information of any kind: personal and business correspondence, confidential personal and financial data, various types of documentation, images and photographs of the user, various projects and presentations, any audio and video information, various archives and databases and much more.
The main condition for the full use of the functionality of any computer devices and the complete safety of the information present on them is the availability of modern high-performance software. Instant information processing, high resistance to external threats and the absence of internal vulnerabilities, unification and compatibility with third-party applications, ease of use and a pleasant user interface - this is the list of the main requirements for modern software responsible for the performance of computer devices.
The software from Microsoft Corporation, developed and presented in 1985, fully meets all the described conditions - the operating system "Windows". By skillfully managing the internal services of computer devices, it offers the user wide functionality for using the computer for personal and business needs, and also instantly copes with the execution of any tasks that are presented to it.
For full functionality in the operating system "Windows" There are various internal management tools. They are responsible for the performance of the system as a whole, as well as for processing and storing any data. Additionally, the system has a certain set of internal files and directories used for the functioning of the operating system. And since all information is presented in digital format, both system and user, its safety and accessibility comes to the fore.
In the operating system "Windows" the user can easily process any data and move information according to their needs. However, such simplified access, due to external influences or erroneous actions of the user himself, can lead to the loss or unwanted deletion of important information from the personal computer storage device. In this article, we will present a basic guide to recover deleted files on an operating system. "Windows". In it we will try to consider possible effective solutions for recovering deleted files in "Windows 10", which are also suitable for earlier versions of the operating system "Windows 8/7/Vista/XP". You will also learn how to recover deleted files from "Baskets", from the hard drive of a personal computer, "SD cards", "USB drive" etc.
Deleted File Recovery Overview
Before starting work, users rarely think about possible sad situations when the necessary file is lost or accidentally deleted. And they do not take any preparatory actions. But when a tragedy occurs and the file with the necessary information is lost, users immediately ask questions:
- What methods are there to recover deleted files?
- Is there a way to review a deleted file before finally restoring it to check its integrity?
- Is there a guarantee that the deleted file will be completely restored?
Sooner or later, every user may encounter a situation when he needs answers to the questions posed. Especially when you accidentally deleted files on your device and really need to get them back.
Files can be deleted in different ways: using a key combination "Shift + Delete", cleared from "Baskets" or removed from "USB drive" etc. In such cases, files are deleted permanently, and you can restore them directly from "Windows Recycle Bins" You can not. It may seem to you that the situation is critical and important information contained in the deleted files is completely lost by you. However, the good news is that in most cases, you can recover deleted files in "Windows". And the whole process will not require significant effort or financial costs from you.
What file deletion scenarios can you encounter? Deleting files is a common action in the operating system "Windows", but users can do it in different ways:
- Deleting files by pressing a key combination together "Shift + Delete"– files deleted in this way will be erased immediately directly, without placing them in "Basket".
- Removing files from "Baskets"– deleting individual files will result in the files being unable to be recovered using standard functions "Baskets".
- Complete cleaning "Baskets"– all files and folders in it will be deleted. As with individual files, restore them with the standard recovery function "Baskets" will be impossible.
- Deleting files from "USB drive", memory card, external hard drive, etc. – files do not fit into "Basket" and are immediately deleted irrevocably.
- Files are lost during the file transfer process, when cutting and then pasting it ( "Cut & Paste").
- As a result of replacement, the file is overwritten when it is inserted into a folder that already contains a file with the same name.
- Files are deleted after malicious action by a malicious program (virus).
Paying attention to the listed methods for permanently deleting files, you may wonder what deleted files can be recovered. Using various file recovery methods, you can recover almost all types of deleted files yourself.
First, you should pay attention to the files placed in "Basket". They can be easily restored before you clean it.
Secondly, you can recover lost or deleted files from previously created backups supported by cloud storage "OneDrive" or other devices. If you backed up to "OneDrive" or other storage devices, you can easily recover lost data from them.
Thirdly, we can say with 100% certainty that it is easy to restore files after recent deletion. If you realize the importance of the deleted files, then immediately stop using the entire partition of the disk or drive on which the deleted files were located. It's likely that your deleted files will be overwritten over time, so it's best to complete the recovery process as soon as possible. Even if you stop using your drive or disk partition to write new data, the operating system can write on its own, especially for the system disk "WITH:/". Using professional file recovery software will help you get your lost data back.
Since deleted files can, in most cases, be easily recovered, there is no need to panic when you encounter such a problem. Next, we will show you how to recover deleted files in the operating system "Windows" different ways.
Why deleted files can be recovered in "Windows"?
Before moving on to describing possible recovery methods, it is necessary to explain why deleted files in the operating system "Windows" do not disappear and can be restored, even after permanent removal. In fact, the answer is quite simple and stems from an understanding of file handling and management in the operating system "Windows". When a file is stored on the hard drive, the system additionally records information containing the file size, file name, location, file type, etc. and stores it separately from the main contents of the file.
When a user accesses a file, the operating system reads all the information about the file and, based on it, searches for content on the storage device. This search method is necessary, because the contents of any file occupy a certain amount of disk space when saved, including a certain number of storage cells (sectors). They can be located across the entire surface of the storage device in different places and not form a single whole (fragmentation storage), but thanks to system information about the file, they are found and collected together for display to the user.
If the user deletes a file, only the corresponding system information about the file is erased, and the actual contents of the file remain unchanged. The reason why the deleted file is no longer displayed is that the system marks the sectors occupied by the contents of the deleted file as free, so that new data can now be stored there.
Therefore, the contents of deleted files are still available on the hard drive until the specified sectors of the storage device are overwritten by new data. This will happen over time if you continue to use your device to save various information or install additional applications and programs. File recovery software can retrieve data left on storage device sectors that are marked as write-free and recover it for you. Therefore, if you need to completely erase a hard drive or other storage media, you will have to take additional steps to completely erase all sectors (for example, overwrite sectors with other data several times).
Signs you should consider before recovering deleted data in "Windows"
In the operating system "Windows" There are a number of specific features that you should take into account before you begin the process of recovering deleted data:
- Deleted files may be fully recovered before they are overwritten by new data, so you should try to protect deleted files from being overwritten. Try to completely stop using the storage device from which the files you plan to recover were deleted. Limit the installation of any software, do not stream video data, and do not download or edit existing files on your hard drive to prevent potential efforts to overwrite the disk space that was allocated to store your files before deleting them. Otherwise, this may result in complete loss of your deleted data and will make it impossible to recover it in the future.
- Professional deleted file recovery software or deleted data recovery service lab experts will not be able to recover completely overwritten files. In this case, you will have to come to terms with their loss. If the file is partially overwritten, then it can be partially restored. The result will directly depend on the remaining amount of unoverwritten data. The more of them left, the more correct the final result will be.
- You can recover deleted files from different types of devices: "USB drive", hard disk, virtual disk, memory card, flash drive, etc. However you can't do this with solid state "SSD drives", because they use technology "TRIM". After deleting files, the command notifies "SSD drive", which blocks do not contain important information and need not be stored. Thanks to "TRIM" the data in the memory cells is completely erased, which makes the read and write speed on drives much faster, but completely eliminates the possibility of subsequent recovery of such data.
- If the deleted files were saved on the system partition of the disk or its directory (for example, on the desktop), then you should turn off the system as soon as possible and restore the data in the environment "WinPE" or connect the hard drive to another personal computer. The operating system, regardless of your actions, records various data for its own needs, and can overwrite your deleted files, making their recovery completely impossible. Preset Environment "Windows" ("WinPE") is a lightweight version of the operating system that can be booted from "USB drive", CD-ROM or over a network, excluding the use of storage space of the host operating system. Connecting your disk with deleted files to another personal computer prevents data from being overwritten by internal system services and will allow you to recover deleted files with a high probability of success.
- Make sure to do a trial of recovering deleted files with any data recovery software before you decide to purchase it. Most paid versions of the software are shareware. This means that such software provides the user with its trial version, which has all the functionality for scanning and full recovery of any type of deleted and lost data. Based on the scanning results, the program allows you to view all detected deleted files and helps the user make sure that the files will be recovered correctly.
Method 1. Recover deleted files from Recycle Bin to "Windows 10"
If you deleted files from the local hard drive on your personal computer or laptop, then the operating system "Windows" will put them in "Basket". These file deletion settings in the operating system are set by default unless you change them further. "Basket" represents a specific area of disk space reserved by the system "Windows" to store the user's deleted files before they are finally cleared. Deleted files will be in "Basket" until you remove them manually or do a full cleanup "Baskets". Also, the storage time of files is affected by the amount of allocated disk space reserved for "Basket". If the volume of deleted files exceeds the internal volume "Baskets", then the older deleted files will be erased and overwritten by the newer ones. This rule applies to all versions of the operating system "Windows", such as "Windows 10/8/7/Vista/XP". To recover deleted files from "Baskets", just follow these steps:
Step 1. Open "Basket" on your computer by double-clicking the desktop icon, or right-click on it and select section from the pop-up context menu "Open".

Step 2. Find the files and folders you want to recover and mark them using standard highlighting methods. To make it easier to search and select the files you need, you can sort them according to different criteria using various filters for this purpose: "Name", "Date of deletion", "Original location", "Size", "Item Type" etc.
Step 3. Right-click on the selected files and select partition from the pop-up context menu "Restore". Or on the main menu ribbon "Baskets" click the button "Restore selected objects". All marked files will be restored and placed in their original location before deletion.

If you want to recover all files located in "Basket", then on the main menu ribbon click the corresponding button "Restore all objects" and they will be returned to their last storage location.

Step 4. Review the recovered files and check if they were recovered correctly and all information is displayed correctly.
Method 2: Retrieving permanently deleted files from backup "Windows".
In case you cannot find the desired deleted files in "Basket", you will have to use backup data or third-party data recovery software to get back the desired deleted files. In this section, we will show you how to recover deleted files from backup "Windows", which you saved earlier. If you do not keep a backup, then go to the methods "4" And "5" see our guide to learn how to get your deleted data back using deleted data recovery software.
Step 1. Click the button "Start" located in the lower left corner of the desktop on "Taskbars" and open the main user menu "Windows". Move the scroll bar down and find the section "Service - Windows". Open the submenu and select the section from the list of available applications "Control Panel".

Step 2. In the window that opens "Control Panel" find and open the section "Backup and Restore (Windows 7)".

Step 3. In the next window, move the scroll bar down to the section "Recovery" and click on the button "Recover my files".

You can then follow the wizard to restore your files from the backup. The recovery procedure is quite simple and will not cause you much difficulty. You can also learn more about operating system backups "Windows" from our video review: "Windows Backup (OneDrive, File History, System Image, Recovery Drive)".
Method 3: Recovering deleted data from previous versions
Previous versions, also called shadow copies, are copies of files or folders that are created in the operating system "Windows" as part of a restore point. This is another type of backup created by the system "Windows". If you have such backups, you can try to retrieve the deleted files this way. This is a fairly effective method, and you can recover your deleted files with a high degree of probability, provided that you regularly create recovery points.
Step 1. Open File Explorer "Windows" and find the folder containing the deleted files.
Step 2. Right-click on the folder and, in the context menu that opens, select section "Restore previous version".

Step 3. You can now view a list of available previous versions. Select the version you want to restore and click the button "Restore".

Learn more about how to create a restore point in "Windows 10" and you can find out how to restore the system using it in our video guide: “How to create, delete a restore point or roll back a Windows 10 system”.
Method 4: Recover files from your hard drive using free data recovery software.
If you tried the first three solutions and were unable to recover your deleted data using them, then you can try free file recovery software. In the international information computer network "Internet" you will be able to find free software from different manufacturers and try to use it to recover your deleted files. Almost all free programs have similar capabilities, so you can choose any of them at your discretion.
Such programs have one undeniable advantage - they are absolutely free, and you do not incur any additional financial costs. They are also immediately ready for use after installation. However, the functionality of such programs is significantly limited. Various additional internal tools will not be available to you; programs will have a limit on recovering a finite amount of data, usually sufficient to recover only one or several small files. But the main disadvantage is the low percentage of files found and recovered.
If you need to recover one small, recently deleted file, then using a free program you will have little chance of success. However, be aware that by installing software on your hard drive, you run the risk of overwriting your deleted files and losing them forever. Therefore, if you need to recover a file of significant size or a certain number of files, then proceed to the method "5" our leadership.
Method 5: Recover Deleted Files in "Windows 10" using professional recovery software.
Using professional deleted data recovery software can greatly increase your chances of successfully recovering the deleted files you are looking for. This method will help recover deleted files from the hard drive of a personal computer, various types of memory cards, "USB drives" of any volume and manufacturer, and will also successfully restore files after complete cleaning "Baskets" and permanent removal.
We recommend using – software for recovering various types of data on different media, with support for all major file systems. This version of the program is shareware and provides users with an evaluation trial version that has all the features of the paid version, which works equally well when searching for deleted and lost files and partitions, so you can test all the recovery options before purchasing the program.

Download the program and install it. Be sure to remember that the program should be installed on another drive to avoid accidentally overwriting deleted files.
After launch, the program will scan all connected devices and display them in its window. The program interface closely resembles the appearance of operating system windows "Windows", which greatly simplifies its use.
Select the required partition to scan in the main program window, then select the type of analysis that the program should apply to search for deleted files. You can choose "Quick Scan" or ask "Full Analysis" to find all possible information. If you recently deleted files, select the option "Quick Scan" for their restoration.

The recovery process depends on various factors and can take from a few minutes to several hours. Click the button "Further" and start the process of analyzing the disk and recovering deleted files.

Then all found files and folders will be reflected in the program window. When you click on each file, the program will use the internal function "Preview" and will show you its contents so you can choose the best option to save later. Find your searched deleted files and recover them by clicking the button "Restore", located on the ribbon under the main menu tabs.

Then select one of the four saving methods offered by the program to choose from and save the recovered file (group of files).

Now navigate to where you saved your file(s) and open it to check the integrity of the file. If you are completely satisfied with the final result, then the process of recovering deleted files is complete.
You can find a more detailed guide on using the program to recover deleted files in our video tutorial: “Recovering deleted files in 2018 with Hetman Partition Recovery”.
Method 6: Recovering deleted data in a specialized laboratory.
Another possible way to recover deleted files is to contact a specialized service laboratory. The specialists of such laboratories have sufficient knowledge and have the appropriate equipment and conditions to recover deleted files.
However, this method will require significant financial costs from you, since the laboratory file recovery process is quite expensive. Therefore, you need to first determine whether your deleted data is worth the excessive financial costs.
This method does not give you a 100% guarantee that your deleted files will be completely restored, but you will, in any case, have to reimburse the costs of recovery, even if the final result is negative. After all, if the data has been overwritten, then it will no longer be possible to restore it.
Therefore, if all the previous solutions did not help you recover the deleted files you are looking for, then perhaps you should create them again or accept their loss.
But if the loss of a file is critical for you, and you agree to bear significant financial costs, then contacting a specialized service laboratory for data recovery will be justified.
Conclusion
Any user data requires careful and responsible handling. An operating system failure caused by external factors or the influence of malware, or erroneous actions by the user themselves can lead to the deletion of important data. However, modern tools allow the user to get their data back.
operating system "Windows" has a built-in tool "Basket" to store deleted files before their final destruction. Timely verification "Baskets" will help you avoid additional steps and instantly recover the required deleted files.
Additionally, you can use the built-in data backup service, which will also allow you to restore deleted files if you configure it first.
Or the user can always use third-party professional software to recover deleted data and restore any files themselves at minimal cost.
If you have questions or suggestions, leave them in the comments to our article, and we will definitely answer them.
Often, novice users delete necessary data from a laptop or accidentally lose it without knowing whether it is possible to recover deleted files, including those on the desktop, and how to do it. There may be quite simple situations where lost documents are literally a couple of clicks away, but there may also be more serious problems that require the use of special applications to solve.
Recovering from the Recycle Bin
All files after deletion while maintaining the standard computer settings fall into the so-called. Recycle Bin is a special folder on the desktop, by opening which you can easily restore any deleted information by highlighting the desired object and selecting the appropriate item in the menu. But files can be deleted permanently without being placed in the trash.
Inexperienced users often accidentally delete application shortcuts and documents from the desktop, believing that if they are gone, then the rest of the program has also been deleted entirely. In this case, many people do not know how to recover deleted files. This is very easy to do, even if the basket is empty. There are two options:
- Roll back the system to the nearest restore point;
- Find the program in the main menu of the Start button and drag the desired shortcuts to the desktop.
The second option is preferable, but if lost programs and documents have disappeared from the list of the main menu on the computer and you do not remember the directory in which they were installed, you will have to use the first.
If you are deciding how to recover a deleted folder from your desktop, and the erroneous action was performed recently, then you probably won’t even have to go to the Recycle Bin. Deletion can be canceled by simultaneously pressing hot Ctrl and Z.
Using a restore point
It is important to understand that rolling back to a previous restore point will not return the program, documents and files if they were deleted. In this way, only erased shortcuts on the desktop can be returned to their place. Here's how it's done using Windows 8 as an example:

A window will open in which, by default, you will be asked to restore to the most recent checkpoint. If necessary, you can specify any other existing restore point.
We use third-party applications
If data and documents from the laptop’s hard drive are completely deleted and cannot be returned using standard OS tools, you will have to use special utilities to recover deleted files. It is important to remember the main rule that increases the chances of successful data recovery - do not write anything to the disk partition that you will be working with later.
Recuva is a simple free utility
The most famous and simple application with which you can recover deleted files is the free Recuva. During installation, select the partition of the disk that does not contain any data to be recovered. The operating principle of Recuva and other similar utilities is approximately the same:

After the scan is completed, the recovery wizard will display on your desktop a list of all the lost documents that it was able to detect. The utility will be able to restore those marked with a green circle without any loss. If the icon color is red, then this file most likely cannot be returned - a recording has already been made over it and most of the data and information about the file are completely lost.

All that remains is to select the files (you can use the corresponding function to search for specific photos and documents), select the directory to save and click “Recover”.
PhotoRec is another functional free utility
The name of the program should not be misleading. The utility recovers not only photos, but also most other types of files. Its advantage is that there is no need for installation - free PhotoRec is downloaded from the office. site in the form of an archive, unpacked, after which you can work with it. This is an important property for such applications - the program can be immediately downloaded to a flash drive and worked with it.

The scheme for returning long-lost information is as follows:
- After launching PhotoRec, the main window immediately opens, in which the drive is selected in the top drop-down menu - you will have to work with it during data recovery. The program also works with img format images created in other applications.
- Below in the window there is a list in which you can select a full disk scan or individual sections.
- Below, you can set the file type to scan by clicking File Format. If you skip this step, the program will try to recover all accidentally deleted data that it can detect.
- You can specify a folder to save the recovered information by clicking the Browse button. In addition, in the File System type menu you will need to select a file system. If you work in a Windows environment, check the second box. Ext 2-4 system is the standard for Linux.
Let's compare the considered applications
For novice users, the PhotoRec program is no less suitable than the above-described Recuva. It is more powerful - it often extracts data from the computer better, but there is still one unpleasant feature. Free PhotoRec does not allow you to view the found files after scanning and select something specific from them. This must be taken into account when working with large hard drives - if you do not specify in advance which files are to be restored, everything will be saved.
Above we discussed the simplest free applications for retrieving accidentally deleted information on the desktop or lost documents after formatting flash drives, hard drives and other media.
It is important that PhotoRec, unlike Recuva, is also a cross-platform utility, i.e., it can work in any operating environment.
Recuva operates only under Windows, starting from the seventh version of the OS. There is also more advanced semi-professional and professional software for retrieving deleted data from any drive. Almost all of them are paid, but the loss of information often costs more. If necessary, you can use the applications R-studio, File Scavenger, Power Data Recovery, Data Rescue PC, etc.
recoverit.ru
How to recover deleted files on your computer
People often come to me asking to recover photos, music, and other files accidentally deleted from their computer. However, this does not always happen by accident, for example, a girl quarreled with a guy, and out of bitterness deleted all the photos with him, and later, having made peace, she clutches her head, “What have I done!” But this is an example; situations in life are different.
Many people think that these files cannot be returned, or you need to contact a specialist who will restore your documents for money. Meanwhile, the file recovery process itself is not that complicated, and following the instructions given in this article, even a novice PC user can handle it.
Recovering deleted files in windows 7, 8.1, 10
First of all, you should look in the trash, if the necessary files are in it, then restoring them is as easy as shelling pears. Just select the desired file and click “Restore selected objects” or “Restore all objects”.

All deleted files always end up in the Recycle Bin and are stored there for some time, unless, of course, you specifically empty the Recycle Bin. If there are no files in the trash, read on.
If the deleted files are no longer in the Recycle Bin, it is still possible to recover them. For this we need a special program Recuva, you can download it from the official website of the developers. There are paid and free versions; the free version is quite enough for us.
After downloading, install the program.


At the last step, click “Run Recuva” to start the program.

Now let's move on to file recovery. In the window that opens, select the type of file to be restored, picture, music, video, document, etc., this will significantly speed up the search for the deleted document.

Now select the folder where the file was located before it was deleted; if you don’t remember, leave “Not exactly known.”

Now click “Start” and you can go about your business, the search process is quite long. The speed of the process depends on the size of the hard drive and the specified search parameters.

After finishing the search, just select the files you need and click restore.

This completes the file recovery process, as you can see everything turned out to be very simple.
interscop.ru
How to recover permanently deleted files in Windows?
 Sometimes, for some reason, people accidentally completely delete important documents from their computers. If you have ever encountered this, then today’s article, where I will tell you how to recover permanently deleted files in Windows, will help you. You might be surprised, but even files deleted from the Recycle Bin are not completely removed from your computer and are stored on your hard drive for some time. Therefore, if a little time has passed since the document was deleted, then there is still hope that they can be restored. This cannot be done with improvised means, so I advise you to download the Handy Recovery program at this address: handy recovery and install it on your computer.
 This program is also good because in addition to restoring deleted files, it can also restore files infected as a result of virus attacks. If you want to know more about this, please sign up in the comments form.
To do this, launch the Handy Recovery program, after which it will ask you to select a local disk for analysis. Select the disk on which the deleted document was located and click “Analyze”, after which the program will begin to analyze this disk for the presence of recoverable files.

When the analysis is complete, you will be able to see all the files that can be returned. Select any of them and pay attention to the “recovery probability” tab, where you can see the probability of what the chances are of getting your files back without damaging them. To continue, click the “restore” button.

Next, a window will appear in which, by clicking the “browse” button, you can select the folder where the file will be restored. Now click “OK” and the process will begin. The time it takes to restore a file depends on its size.

After the process is completed, you will find your previously deleted document in the same place from which you deleted it. I would like to add that this program does not guarantee you complete document recovery, and in principle, there are no programs that can guarantee this. But another useful feature is that it can restore deleted Chrome history. That’s all for me! If you have any questions or have something to add to this topic, write in the comments. And with this I say goodbye to you, bye everyone.
www.yrokicompa.ru
Recovering a deleted file or folder
I think many people have had a situation in which you accidentally or someone intentionally deleted a file or folder with very important information. And naturally the question arose: How to recover a deleted file or folder? The first thing you need to do is not to be upset or upset, because almost any information deleted from a computer/laptop, USB drive can be easily recovered by yourself, but for successful recovery you need to understand one rule:
There is no need to write files or install programs on the hard drive or USB flash drive that contains the information you want to recover. This is connected with the principle of deleting information, the fact is that when you click on the “delete” button, the information is not actually deleted, but only its header is erased, the file or folder itself remains, but the next time it is written to a disk or USB, it is replaced in the place where a deleted file or folder is located, new information is written, the old one can no longer be restored.
Ways to recover a deleted file or folder.
1) Check cart
The first and simplest thing to do is check the Recycle Bin to see if there is a deleted file or folder there. To do this, click on the Recycle Bin shortcut on the desktop and if you see a file or folder there that you accidentally deleted, right-click on it and select “Restore”. The data will be restored to the same location where it was before it was deleted.

If you are unlucky and you do not find the deleted file or folder in the trash, then you need to use one of the recovery programs described below
2) Use the free data recovery program Recuva.
First of all, go to the Recuva website and download the latest version of the program. Then you start installing the downloaded program, the installation process is very simple, the first step is to select the installation language.

Then we specify additional parameters (whether to create a shortcut on the desktop, whether to search for program updates...), you can leave them as default. Please note that if the deleted file was located on the disk where the operating system is installed (often drive C), then the Recuva program should not be installed on this disk, otherwise by installing it you may overwrite the file and it will not be possible to recover it. To select a different drive for installing the program, click the "Advanced" button and specify a different path for installing the program.

After this, you will be prompted to install the Google Chrome browser; if you do not want to install, uncheck the box.

After installation, the Recuva wizard will launch to help you recover your files or folder. I strongly recommend using the wizard, as it is more understandable and convenient. Click "Next"

Selecting the type of recovered file

Select the location where the file or folder was located.

Check the box "Enable in-depth analysis" and click "Start".

After this, the search for files will begin, this can take up to several tens of minutes, depending on many factors (computer power, disk or USB device capacity, disk speed, USB device, etc.).
After searching, you will see a list of files that can be recovered. If you want to get more detailed information about the files, you can click on the "Go to advanced mode" button.

To restore a file, check the boxes next to them and click the "Restore" button, then indicate where to restore the file and within a few seconds the file will be restored. 
3) Using the paid program EasyRecovery.
I, like many, am for free software, but in this article I will describe file recovery using a paid program, since during my test recoveries this program saw more deleted files than Recuva (2385 files versus 2461). I would recommend using this program if the free one did not help. You will still not lose anything, since with this program you can find deleted files for free, but to restore these found files and folders you will need a license key.
So, first of all, download the latest version of the EasyRecovery program (in this example I will use the Home version). Let's install... the process is not complicated, we agree with everything and click "Next", let me remind you that the program must be installed on the volume (disk) from which you will not restore the file or folders, since you can overwrite the file or folder being restored. After installation, run the program, the first window to appear is the licensing window, which you can skip if you click “Run as a DEMO”. The first EasyRecovery window appears in front of us, click “Continue”.

In the next window, select the location where the file that needs to be restored is located.

The next step is to select a recovery scenario. If the file or folder was simply deleted, it is recommended to select "Deleted File Recovery", if the hard drive/USB flash drive was formatted, you must select "Formatted Media Recovery".

After this, an information window will appear in which all the specified search settings are indicated; if you have not confused anything, click “Continue”.

The search for files will begin, this process may take quite a lot of time, depending on the volume size of the hard drive or USB device, the power of the computer, etc. After the entire disk or USB flash drive is scanned, all deleted files will appear in front of you, divided into groups depending from expansion. If you click on a file and try to open the file (Open) or save it (Save as), you will be prompted to enter a license key; without it, the file will not be restored.
I hope this step-by-step guide helped you recover your files and folders, saving a lot of time and possibly money. In the future, I recommend using backup of important files, if possible, store important files on several media or at least in different folders.
pk-help.com
How to recover deleted files and data from a computer Windows 7, 8, 10, recovery programs, recover data after formatting
The first thing you need to do if you need to restore a file is to run a search in all subfolders of all disks, and also simply look in the Recycle Bin. There is a possibility that the data was not deleted, and you simply do not remember its location, or it was deleted using the Del key followed by confirmation, which in essence is also not deletion, but only moving to a system container called “Trash”. Restoring it will be easy, unless of course you have emptied the Recycle Bin before. If the file you are looking for is there, you can easily find it by sorting it by date of deletion. Right-click on its icon and select Restore.
Pay attention to the column in the Recycle Bin Original location - this is the path where the recovered file will end up.
In addition, if you are a user of any cloud synchronization service (for example, Google Drive or DropBox), we recommend that you look in the cloud storage trash.
We use third-party utilities
If the required file was not found as described above, the recycle bin was emptied, or a complete deletion was performed using the “Shift+Del” combination or special software. In this case, you should resort to the help of one of the many third-party utilities. They will help if during the time that has passed since the deletion, no data has been written to the disk that previously stored this file.
Hetman Partition Recovery
With this program you can recover files of any type. A high-quality low-level search algorithm will allow you to recover the maximum amount of data even in the most complex cases when file tables are empty or missing. Restoration occurs based on start and end signatures. You can regenerate data not only from a hard drive, but also from any removable storage device.
Cleaning the WinSxS folder in windows
The procedure is as follows: select the logical drive or removable media from which the document was most likely deleted.
A window will appear with a choice of analysis - quick and complete. The difference is serious. A quick one will take place in just a few moments - it will produce few results, a full analysis will work more efficiently and deeply. The entire surface of the disk will be carefully scanned and you will be given the most complete information. Having selected the type of analysis, click “Next”.
Having completed the process, the utility will return the disk structure by marking the recovered files with a red cross in the place from which they were deleted.
Mark the documents that require recovery and click “Recover”. Before saving, you can view the contents of any file.
EaseUS Data Recovery Wizard
Immediately about the shortcomings of the utility - it is paid, the free version allows you to recover no more than 2 GB. Secondly, you cannot create a bootable recovery disk using it. In the English version, the main menu of the program looks like this. 
As you can see, everything is quite simple. Three icons: Recover deleted files, Full, Partial (partitioned) recovery. By selecting Complete Recovery in the next window, check the file types to search. 
Click Next - select the drive and Next again. 
After waiting for the Searching procedure to complete, the names and sizes of the files will be displayed in Explorer; to restore, select the ones you need and click “Recover.” Specify another drive where you want to save the information.
The results of the work are encouraging - most of the files were recovered. 
CardRecovery
This small-sized free utility specializes more in flash drives and SD cards. It works quickly and very efficiently. 
Ways to format a flash drive on MacOS
The interface is in English, but simple and intuitive. We specify the removable media, click Recover and wait for the scan results.
Recuva
Probably one of the most famous and recommended programs for these purposes. We will recommend her too. It is completely free. A high-quality simple Russian-language interface is available here. 
The place from where we will restore or mark the item It is not known exactly - and again “Next”. 
A list of found documents will open, mark the required ones with a checkmark and click the “Recover” button. 
You can view the data by first switching to advanced mode. 
The main thing is not to restore data to the place where it was lost; use another disk or media for this.
Recuva is available not only for a computer, it can also be successfully used on a smartphone (Android).
Photorescue
This utility is designed to return lost photos from SD cards and flash drives. 
By running the utility as administrator, select the physical disk. During scanning, the program will ask for some parameters (intervals, cluster size). You can leave it as default. Once the scan is complete, you will see the results, where you can select files and save to your computer.
“I deleted an important file!” Stories with this beginning happen to users quite often. It is possible that some of our readers have already encountered a similar problem. Such stories always begin the same, but end differently. In this article I will tell you how to make the ending of this story happy. Or at least do everything to make the likelihood of a happy outcome higher.
1. What to do if an important file or folder is deleted?
Well first of all, don't panic. When you throw out garbage, you don’t immediately send it to a landfill. First a trash can, then a container, and only then a landfill. This happens in Windows too. Using the Del key, you first send the file to the Trash. Then, after emptying the recycle bin, the file can be found on disk in unused clusters for some time (this is analogous to our container from the example). And only after the area on the disk in which there were still traces of the file is occupied by other data, then the file is hopelessly lost (this is already a landfill).
1.1 Search in the Cart
It may sound trivial, but the Recycle Bin is the first means of protecting data from accidental deletion. At the same time, many Windows users automatically clean it immediately after placing files in it. Although, by and large, the Recycle Bin does not need to be emptied at all, because it does it automatically.
Searching for files in it is not at all difficult. Find its icon on your desktop and open it. If the file name is known, then simply write it in the search box. You can also sort files in the Recycle Bin by deletion date and immediately find the file you need that was just deleted.
The next time you think about using some utility that cleans out the Recycle Bin in the background to free up disk space, think carefully about whether you should trust this important process to an automatic machine. It may be easier to do it yourself and at a time when you are sure that there is nothing valuable in it.
1.2 Searching among shadow copies
It is not necessary to use any paid programs for this purpose. The standard backup tool in Windows 7 is quite suitable and this system is turned on automatically when you install the operating system.
If “System Protection” is not disabled manually (which is often recommended by would-be optimizers), then restoring a deleted file from a shadow copy in Windows 7 is quite simple.
- In Explorer, find the folder where the deleted file was (not the Recycle Bin).
- Click on the name of this folder right mouse button and select " Properties»
- Go to the " Previous versions"(see picture below).
It contains information about all versions of files that were in this folder at different times.

We select the closest one by date and try to search for our file in it. If it is not there, we turn to an earlier version. And so on until you find the desired file.
This way, you can not only recover an accidentally deleted file, but also return to one of the previous versions of a document that was changed and saved on disk, and then its previous version was needed.
Shadow copies of user files are created automatically by the operating system during reboots and installation of various programs at system restore points. Therefore, you don’t need to do anything separately to create them. The main thing is not to disable “System Protection,” since some “experts” recommend disabling it to save resources, keeping silent about the fact that the security of the system as a whole will decrease.
2. If standard remedies did not help
2.1 Use a third-party file recovery utility
You can use a specialized data recovery utility, which, after analyzing the disk, will display a list of files and folders that you can try to recover. One of these programs can be kept on disk in case of fire.
The chances that the file will be recovered without loss are not so great, but there can be luck. Here, a very important point that influences the “success of the concession” is the minimum number of disk operations from the moment the file is deleted. Some sources even tell us to urgently turn off the computer and boot from a flash drive or disk. To me, this is pure paranoia. It is much easier to follow the simple rules that I will give below and not needlessly risk your nerves.

I will immediately upset the happy owners of SSD drives - they do not have this chance of salvation! The fact is that the system regularly performs the TRIM function for such disks, which resets sectors with deleted files.
2.2 Don't forget about the professionals
There are people who can help with recovering deleted files on a disk. There is a chance of running into a charlatan or an inexperienced specialist, as in any other type of service. But if the file is really valuable, then it may make sense to pay professionals.
3. What can I do to prevent files from disappearing without a trace?
3.1 Do not disable standard protection measures - they are very effective
The operating system developers have come up with a multi-level protection system against problems associated with accidental data deletion. Do not neglect them and disable them, as well as empty the Recycle Bin every time immediately after deleting a document. Make sure that “System Protection” is activated and that the Recycle Bin is working properly. With these system components, it is possible to lose a file irretrievably unless on purpose. To prevent data loss due to disk failure, use the recommendations in the following paragraphs.
3.2 Use cloud storage
Despite the chance of information disclosure, synchronize your folder of important documents with cloud storage. I have not seen a user whose documents would take up 10 GB, which is how much cloud disks are willing to offer for free. They also offer their own applications that will synchronize your document folder with the cloud. For example, I use . But there are also such products as Google Drive, Yandex.Disk and, of course, the famous .

Yes, it is very important that cloud storages also have their own basket! Don't forget to look there too if your local copy of the file is irretrievably lost.

3.3 Make regular backups
If you have an operating system other than Windows 7, 8 or 10 installed, we advise you to make backup copies using a special utility.
Windows 7
Windows 7 has its own utility for backing up versions of important files, “Backup or Restore,” which is located in the “Control Panel.”

To create backup copies, you will need a separate hard drive (external or internal) that has enough free space to accommodate an image of the entire system disk, as well as to create backup copies of user files.
Windows 8/10
This version of the operating system has a more advanced feature called File History, which is turned off by default. If you have really important documents, take the trouble to enable version control for them. Just type “res” in the control panel search box, as shown in the picture.

Then, in the “File History” window, make the necessary settings. By default, the system suggests storing versions of all documents and drawings. If you have large folders with home photos in your documents, then it is better to make backup copies of them yourself, as I described in. And in “File History” it is better to place these folders in “excluded” folders.

Now you will have copies of the document for each change option. Your dissertation or thesis will be safe. Even if you deleted an entire chapter by mistake and wrote down the document.
File History requires the use of a removable storage device. This is in case the main hard drive fails. So don’t spare money and buy a flash drive for a hundred or two rubles (for example, 8 GB), so that you don’t have to shell out a thousand or two later to restore files bit by bit from the body of a dead hard drive.