Using robots txt. How to edit the robots txt file. Easily create a file for any search engine
This article contains an example of the optimal, in my opinion, code for the robots.txt file for WordPress, which you can use in your websites.
To begin with, let's remember why do you need robots.txt- the robots.txt file is needed exclusively for search robots to “tell” them which sections/pages of the site to visit and which they should not visit. Pages that are closed from visiting will not be included in the search engine index (Yandex, Google, etc.).
Option 1: Optimal robots.txt code for WordPress
User-agent: * Disallow: /cgi-bin # classic... Disallow: /? # all query parameters on the main page Disallow: /wp- # all WP files: /wp-json/, /wp-includes, /wp-content/plugins Disallow: *?s= # search Disallow: *&s= # search Disallow: /search # search Disallow: /author/ # author archive Disallow: */embed # all embeddings Disallow: */page/ # all types of pagination Allow: */uploads # open uploads Allow: /*/*.js # inside /wp - (/*/ - for priority) Allow: /*/*.css # inside /wp- (/*/ - for priority) Allow: /wp-*.png # images in plugins, cache folder, etc. Allow: /wp-*.jpg # images in plugins, cache folder, etc. Allow: /wp-*.jpeg # images in plugins, cache folder, etc. Allow: /wp-*.gif # images in plugins, cache folder, etc. Allow: /wp-*.svg # images in plugins, cache folder, etc. Allow: /wp-*.pdf # files in plugins, cache folder, etc. Allow: /wp-admin/admin-ajax.php #Disallow: /wp/ # when WP is installed in the wp subdirectory Sitemap: http://example.com/sitemap.xml Sitemap: http://example.com/sitemap2. xml # another file #Sitemap: http://example.com/sitemap.xml.gz # compressed version (.gz) # Code version: 1.1 # Don't forget to change `site.ru` to your site.Code analysis:
- Disallow: /cgi-bin - closes the scripts directory on the server
- Disallow: /feed - closes the RSS feed of the blog
- Disallow: /trackback - closes notifications
- Disallow: ?s= or Disallow: *?s= - closes search pages
- Disallow: */page/ - closes all types of pagination
The Sitemap rule: http://example.com/sitemap.xml points the robot to a file with a sitemap in XML format. If you have such a file on your site, then write the full path to it. There may be several such files, then we indicate the path to each one separately.
In the line Host: site.ru we indicate the main mirror of the site. If a site has mirrors (copies of the site on other domains), then in order for Yandex to index them all equally, you need to specify the main mirror. Host directive: only Yandex understands, Google does not understand! If the site operates under the https protocol, then it must be specified in Host: Host: http://example.com
From Yandex documentation: “Host is an independent directive and works anywhere in the file (intersectional).” Therefore, we put it at the top or at the very end of the file, through an empty line.
In the User-agent: * line we indicate that all the rules below will work for all search robots *. If you need these rules to work only for one specific robot, then instead of * we indicate the name of the robot (User-agent: Yandex, User-agent: Googlebot).
In the Allow: */uploads line, we intentionally allow pages that contain /uploads to be indexed. This rule is mandatory, because above we prohibit indexing pages starting with /wp- , and /wp- included in /wp-content/uploads. Therefore, in order to override the Disallow: /wp- rule, you need the line Allow: */uploads , because for links like /wp-content/uploads/... We may have pictures that need to be indexed, and there may also be some downloaded files that there is no need to hide. Allow: can be "before" or "after" Disallow: .
The remaining lines prohibit robots from “following” links that begin with:
Because the presence of open feeds is required, for example, for Yandex Zen, when you need to connect a site to a channel (thanks to the commentator “Digital”). Perhaps open feeds are needed elsewhere.
At the same time, feeds have their own format in the response headers, thanks to which search engines understand that this is not an HTML page, but a feed and, obviously, process it somehow differently.
The Host directive is no longer needed for Yandex
Yandex completely abandons the Host directive and has replaced it with a 301 redirect. Host can be safely removed from robots.txt. However, it is important that all site mirrors have a 301 redirect to the main site (main mirror).
This is important: sorting rules before processing
Yandex and Google process the Allow and Disallow directives not in the order in which they are specified, but first sort them from short rule to long, and then process the last matching rule:
User-agent: * Allow: */uploads Disallow: /wp-
will be read as:
User-agent: * Disallow: /wp- Allow: */uploads
To quickly understand and apply the sorting feature, remember this rule: “the longer the rule in robots.txt, the higher priority it has. If the length of the rules is the same, then priority is given to the Allow directive."
Option 2: Standard robots.txt for WordPress
I don’t know why, but I’m for the first option! Because it is more logical - there is no need to completely duplicate the section in order to indicate the Host directive for Yandex, which is intersectional (understood by the robot anywhere in the template, without indicating which robot it refers to). As for the non-standard Allow directive, it works for Yandex and Google, and if it does not open the uploads folder for other robots that do not understand it, then in 99% of cases this will not entail anything dangerous. I have not yet noticed that the first robots does not work as it should.
The above code is a little incorrect. Thanks to the commentator " " for pointing out the incorrectness, although I had to figure out what it was myself. And this is what I came up with (I could be wrong):
- The Yandex Host: directive must be used after Disallow:, because some robots (not Yandex and Google) may not understand it and generally reject robots.txt. Yandex itself, judging by the documentation, absolutely doesn’t care where and how to use Host:, even if you generally create robots.txt with just one line Host: www.site.ru in order to glue all the site mirrors together.
Some robots (not Yandex and Google) do not understand more than 2 directives: User-agent: and Disallow:
3. Sitemap: an intersectional directive for Yandex and Google and apparently for many other robots too, so we write it at the end with an empty line and it will work for all robots at once.
Based on these amendments, the correct code should look like this:
User-agent: Yandex Disallow: /wp-admin Disallow: /wp-includes Disallow: /wp-content/plugins Disallow: /wp-json/ Disallow: /wp-login.php Disallow: /wp-register.php Disallow: */embed Disallow: */page/ Disallow: /cgi-bin Disallow: *?s= Allow: /wp-admin/admin-ajax.php Host: site.ru User-agent: * Disallow: /wp-admin Disallow : /wp-includes Disallow: /wp-content/plugins Disallow: /wp-json/ Disallow: /wp-login.php Disallow: /wp-register.php Disallow: */embed Disallow: */page/ Disallow: / cgi-bin Disallow: *?s= Allow: /wp-admin/admin-ajax.php Sitemap: http://example.com/sitemap.xmlLet's add it for ourselves
If you need to block any other pages or groups of pages, you can add a rule (directive) below Disallow:. For example, we need to close all entries in a category from indexing news, then before Sitemap: add a rule:
Disallow: /news
It prevents robots from following such links:
- http://example.com/news
- http://example.com/news/drugoe-nazvanie/
If you need to close any occurrences of /news , then write:
Disallow: */news
- http://example.com/news
- http://example.com/my/news/drugoe-nazvanie/
- http://example.com/category/newsletter-nazvanie.html
You can study robots.txt directives in more detail on the Yandex help page (but keep in mind that not all the rules described there work for Google).
Robots.txt check and documentation
You can check whether the prescribed rules work correctly using the following links:
- Yandex: http://webmaster.yandex.ru/robots.xml.
- At Google this is done in Search console. You need authorization and the presence of the site in the webmaster panel...
- Service for creating a robots.txt file: http://pr-cy.ru/robots/
- Service for creating and checking robots.txt: https://seolib.ru/tools/generate/robots/
I asked Yandex...
I asked a question in tech. Yandex support regarding the intersectional use of the Host and Sitemap directives:
Question:
Hello!
I’m writing an article about robots.txt on my blog. I would like to receive an answer to this question (I did not find a clear “yes” in the documentation):If I need to glue all the mirrors and for this I use the Host directive at the very beginning of the robots.txt file:
Host: site.ru User-agent: * Disallow: /asd
Will Host: site.ru work correctly in this example? Will it indicate to robots that site.ru is the main mirror? Those. I use this directive not in a section, but separately (at the beginning of the file) without indicating which User-agent it refers to.
I also wanted to know whether the Sitemap directive must be used inside a section or can it be used outside: for example, through an empty line, after a section?
User-agent: Yandex Disallow: /asd User-agent: * Disallow: /asd Sitemap: http://example.com/sitemap.xml
Will the robot understand the Sitemap directive in this example?
I hope to receive an answer from you that will put an end to my doubts.
Answer:
Hello!
The Host and Sitemap directives are intersectional, so they will be used by the robot regardless of the place in the robots.txt file where they are specified.
--
Sincerely, Platon Shchukin
Yandex support service
Conclusion
It is important to remember that changes in robots.txt on an already working site will only be noticeable after several months (2-3 months).
There are rumors that Google can sometimes ignore the rules in robots.txt and take a page into the index if it considers that the page is very unique and useful and it simply must be in the index. However, other rumors refute this hypothesis by the fact that inexperienced optimizers can incorrectly specify the rules in robots.txt and thus close the necessary pages from indexing and leave unnecessary ones. I'm more inclined to the second assumption...
Dynamic robots.txt
In WordPress, the request for the robots.txt file is processed separately and it is not at all necessary to physically create a robots.txt file in the root of the site, moreover, this is not recommended, because with this approach it will be very difficult for plugins to change this file, and this is sometimes necessary.
Read about how the dynamic creation of a robots.txt file works in the description of the function, and below I will give an example of how you can change the contents of this file on the fly, through a hook.
To do this, add the following code to your functions.php file:
Add_action("do_robotstxt", "my_robotstxt"); function my_robotstxt())( $lines = [ "User-agent: *", "Disallow: /wp-admin/", "Disallow: /wp-includes/", "", ]; echo implode("\r\n ", $lines); die; // terminate PHP work)
User-agent: * Disallow: /wp-admin/ Disallow: /wp-includes/
Crawl-delay - timeout for crazy robots (not taken into account since 2018)
Yandex
Having analyzed letters over the past two years to our support regarding indexing issues, we found out that one of the main reasons for slow downloading of documents is an incorrectly configured Crawl-delay directive in robots.txt […] So that site owners no longer have to worry about this and To ensure that all really necessary website pages appear and are updated in search quickly, we decided to abandon the Crawl-delay directive.
When the Yandex robot scans the site like crazy and this creates unnecessary load on the server. You can ask the robot to “slow down.”
To do this, you need to use the Crawl-delay directive. It indicates the time in seconds that the robot must idle (wait) to scan each subsequent page of the site.
For compatibility with robots that do not follow the robots.txt standard well, Crawl-delay must be specified in the group (in the User-Agent section) immediately after Disallow and Allow
Yandex Robot understands fractional values, for example, 0.5 (half a second). This does not guarantee that the search robot will visit your site every half second, but it allows you to speed up the site crawl.
User-agent: Yandex Disallow: /wp-admin Disallow: /wp-includes Crawl-delay: 1.5 # timeout 1.5 seconds User-agent: * Disallow: /wp-admin Disallow: /wp-includes Allow: /wp-* .gif Crawl-delay: 2 # timeout 2 seconds
Googlebot does not understand the Crawl-delay directive. The timeout for its robots can be specified in the webmaster panel.
On the avi1.ru service you can now purchase SMM promotion in more than 7 of the most popular social networks. At the same time, pay attention to the fairly low cost of all site services.
Reading time: 7 minute(s)
Almost every project that comes to us for audit or promotion has an incorrect robots.txt file, and often it is missing altogether. This happens because when creating a file, everyone is guided by their imagination, and not by the rules. Let's figure out how to correctly compose this file so that search robots work with it effectively.
Why do you need to configure robots.txt?
Robots.txt is a file located in the root directory of a site that tells search engine robots which sections and pages of the site they can access and which they cannot.
Setting up robots.txt is an important part in search engine results; properly configured robots also increases site performance. Missing Robots.txt won't stop search engines from crawling and indexing your site, but if you don't have this file, you may have two problems:
The search robot will read the entire site, which will “undermine” the crawling budget. Crawling budget is the number of pages that a search robot is able to crawl in a certain period of time.
Without a robots file, the search engine will have access to draft and hidden pages, to hundreds of pages used to administer the CMS. It will index them, and when it comes to the necessary pages that provide direct content for visitors, the crawling budget will “run out.”
The index may include the site login page and other administrator resources, so an attacker can easily track them and carry out a ddos attack or hack the site.
How search robots see a site with and without robots.txt:

Robots.txt syntax
Before we start understanding the syntax and setting up robots.txt, let's look at what the “ideal file” should look like:

But you shouldn’t use it right away. Each site most often requires its own settings, since we all have a different site structure and different CMS. Let's look at each directive in order.
User-agent
User-agent - defines a search robot that must follow the instructions described in the file. If you need to address everyone at once, use the * icon. You can also contact a specific search robot. For example, Yandex and Google:

Using this directive, the robot understands which files and folders are prohibited from being indexed. If you want your entire site to be open for indexing, leave the Disallow value empty. To hide all content on the site after Disallow, put “/”.
We can prevent access to a specific folder, file or file extension. In our example, we contact all search robots and block access to the bitrix, search folder and the pdf extension.

Allow
Allow forces pages and sections of the site to be indexed. In the example above, we contact the Google search robot, block access to the bitrix, search folder and the pdf extension. But in the bitrix folder we force open 3 folders for indexing: components, js, tools.

Host - site mirror
A mirror site is a duplicate of the main site. Mirrors are used for a variety of purposes: changing the address, security, reducing the load on the server, etc.
Host is one of the most important rules. If this rule is written down, the robot will understand which of the site’s mirrors should be taken into account for indexing. This directive is necessary for Yandex and Mail.ru robots. Other robots will ignore this rule. Host is registered only once!
For the “https://” and “http://” protocols, the syntax in the robots.txt file will be different.
Sitemap - site map
A sitemap is a form of site navigation that is used to inform search engines about new pages. Using the sitemap directive, we “forcibly” show the robot where the map is located.

Symbols in robots.txt
Symbols used in the file: “/, *, $, #”.

Checking functionality after setting up robots.txt
After you have placed Robots.txt on your website, you need to add and check it in the Yandex and Google webmaster.
Yandex check:
- Follow this link .
- Select: Indexing settings - Robots.txt analysis.
Google check:
- Follow this link .
- Select: Scan - Robots.txt file inspection tool.
This way you can check your robots.txt for errors and make the necessary adjustments if necessary.
- The contents of the file must be written in capital letters.
- Only one file or directory needs to be specified in the Disallow directive.
- The "User-agent" line must not be empty.
- User-agent should always come before Disallow.
- Don't forget to include a slash if you need to disable indexing of a directory.
- Before uploading a file to the server, be sure to check it for syntax and spelling errors.
I wish you success!
Video review of 3 methods for creating and customizing the Robots.txt file
Hi all! Today I would like to tell you about robots.txt file. Yes, a lot has been written about it on the Internet, but, to be honest, for a very long time I myself could not understand how to create the correct robots.txt. I ended up making one and it’s on all my blogs. I don't notice any problems, robots.txt works just fine.
Robots.txt for WordPress
Why, in fact, do we need robots.txt? The answer is still the same - . That is, compiling robots.txt is one of the parts of search engine optimization of a site (by the way, very soon there will be a lesson that will be devoted to all the internal optimization of a site on WordPress. Therefore, do not forget to subscribe to RSS so as not to miss interesting materials.).
One of the functions of this file is indexing ban unnecessary website pages. It also sets the address and states the main thing site mirror(site with or without www).
Note: for search engines, the same site with www and without www are completely different sites. But, realizing that the content of these sites is the same, search engines “glue” them together. Therefore, it is important to register the main mirror of the site in robots.txt. To find out which is the main one (with www or without www), just type the address of your site in the browser, for example, with www, if you are automatically redirected to the same site without www, then the main mirror of your site is without www. I hope I explained it correctly.
Was:
Now (after going to the site, www were automatically deleted, and the site became without www):


So, this treasured one, in my opinion, correct robots.txt for WordPress You can see below.
Correct for WordPress
User-agent: *
Disallow: /cgi-bin
Disallow: /wp-admin
Disallow: /wp-includes
Disallow: /wp-content/cache
Disallow: /wp-content/themes
Disallow: /trackback
Disallow: */trackback
Disallow: */*/trackback
Disallow: */*/feed/*/
Disallow: */feed
Disallow: /*?*
Disallow: /tag
User-agent: Yandex
Disallow: /cgi-bin
Disallow: /wp-admin
Disallow: /wp-includes
Disallow: /wp-content/plugins
Disallow: /wp-content/cache
Disallow: /wp-content/themes
Disallow: /trackback
Disallow: */trackback
Disallow: */*/trackback
Disallow: */*/feed/*/
Disallow: */feed
Disallow: /*?*
Disallow: /tag
Host: website
Sitemap: https://site/sitemap.xml.gz
Sitemap: https://site/sitemap.xml
You need to copy everything given above into a text document with the .txt extension, that is, so that the file name is robots.txt. You can create this text document, for example, using the program. Just don't forget, please change the last three lines address to the address of your website. The robots.txt file should be located in the root of the blog, that is, in the same folder where the wp-content, wp-admin, etc. folders are located.
For those who are too lazy to create this text file, you can simply correct 3 lines there as well.
I would like to note that you don’t need to overburden yourself with the technical parts that will be discussed below. I bring them for “knowledge”, so to speak, a general outlook, so that they know what is needed and why.
So the line:
User-agent
sets rules for some search engine: for example, “*” (asterisk) indicates that the rules are for all search engines, and what is below
User-agent: Yandex
means that these rules are only for Yandex.
Disallow
Here you “throw in” sections that do NOT need to be indexed by search engines. For example, on a page I have a duplicate of articles (repetition) with regular articles, and duplication of pages has a negative impact on search engine promotion, therefore, it is highly desirable that these sectors need to be closed from indexing, which is what we do using this rule:
Disallow: /tag
So, in the robots.txt given above, almost all unnecessary sections of a WordPress site are closed from indexing, that is, just leave everything as it is.
Host
Here we set the main mirror of the site, which I talked about just above.
Sitemap
In the last two lines we specify the address of up to two sitemaps created using .
Possible problems
Go to the section Indexing settings –> Robots.txt analysis:

Already there, click on the “Load robots.txt from the site” button, and then click on the “Check” button:

If you see something like the following message, it means you have the correct robots.txt for Yandex:

You can also add the address of any article on the site to the “List of URLs” to check whether robots.txt prohibits indexing of this page:


As you can see, we don’t see any prohibition on page indexing from robots.txt, which means everything is in order :).
I hope you won’t have any more questions, such as: how to compose robots.txt or how to make this file correct. In this lesson I tried to show you the correct example robots.txt:

See you soon!
P.s. Quite recently I, what interesting happened? 🙂
A site map greatly simplifies the indexing of your blog. Every website and blog must have a site map. But also every website and blog should have a file robots.txt. The robots.txt file contains a set of instructions for search robots. You could say these are the rules of behavior for search robots on your blog. This file also contains the path to the sitemap of your blog. And, in fact, with a correctly composed robots.txt file, the search robot does not waste precious time searching for a sitemap and indexing unnecessary files.
What is the robots.txt file?
robots.txt– this is a text file that can be created in a regular “notepad”, located in the root of your blog, containing instructions for search robots.
These instructions prevent search robots from randomly indexing all your god's files, and focus on indexing exactly those pages that should be included in search results.
Using this file, you can prevent indexing of WordPress engine files. Or, say, the secret section of your blog. You can specify the path to your blog map and the main mirror of your blog. Here I mean your domain name with www and without www.
Site indexing with and without robots.txt
This screenshot clearly shows how the robots.txt file prohibits the indexing of certain folders on the site. Without a file, everything on your site is available to the robot.
Basic directives of the robots.txt file
In order to understand the instructions that the robots.txt file contains, you need to understand the basic commands (directives).
User-agent– this command indicates robot access to your site. Using this directive, you can create instructions individually for each robot.
User-agent: Yandex – rules for the Yandex robot
User-agent: * - rules for all robots
Disallow and Allow– prohibition and permission directives. Using the Disallow directive, indexing is prohibited, while Allow allows it.
Example of a ban:
User-agent: *
Disallow: / - ban on the entire site.
User-agent: Yandex
Disallow: /admin – prohibits the Yandex robot from accessing pages located in the admin folder.
Resolution example:
User-agent: *
Allow: /photo
Disallow: / - ban on the entire site, except for pages located in the photo folder.
Note! the Disallow directive: without a parameter allows everything, and the Allow directive: without a parameter prohibits everything. And there should not be an Allow directive without Disallow.
Sitemap– specifies the path to the site map in xml format.
Sitemap: https://site/sitemap.xml.gz
Sitemap: https://site/sitemap.xml
Host– the directive defines the main mirror of your blog. It is believed that this directive is prescribed only for Yandex robots. This directive should be specified at the very end of the robots.txt file.
User-agent: Yandex
Disallow: /wp-includes
Host: website
Note! The main mirror address is specified without specifying the hypertext transfer protocol (http://).
How to create robots.txt
Now that we are familiar with the basic commands of the robots.txt file, we can begin creating our file. In order to create your own robots.txt file with your individual settings, you need to know the structure of your blog.
We will look at creating a standard (universal) robots.txt file for a WordPress blog. You can always add your own settings to it.
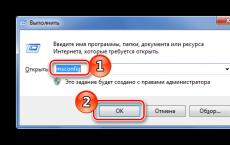
So let's get started. We will need a regular “notepad”, which is found in every Windows operating system. Or TextEdit on MacOS.
Open a new document and paste these commands into it:
User-agent: * Disallow: Sitemap: https://site/sitemap.xml.gz Sitemap: https://site/sitemap.xml User-agent: Yandex Disallow: /wp-login.php Disallow: /wp-register .php Disallow: /cgi-bin Disallow: /wp-admin Disallow: /wp-includes Disallow: /xmlrpc.php Disallow: /wp-content/plugins Disallow: /wp-content/cache Disallow: /wp-content/themes Disallow: /wp-content/languages Disallow: /category/*/* Disallow: /trackback Disallow: */trackback Disallow: */*/trackback Disallow: /tag/ Disallow: /feed/ Disallow: */*/feed/ */ Disallow: */feed Disallow: */*/feed Disallow: /?feed= Disallow: /*?* Disallow: /?s= Host: site
Don't forget to replace the parameters of the Sitemap and Host directives with your own.
Important! When writing commands, only one space is allowed. Between directive and parameter. Under no circumstances should you put spaces after a parameter or just anywhere.
Example:
Disallow:<пробел>/feed/
This example robots.txt file is universal and fits any WordPress blog with CNC URLs. Read about what CNC is. If you have not configured the CNC, I recommend removing Disallow: /*?* Disallow: /?s= from the proposed file

Uploading the robots.txt file to the server
The best way for this kind of manipulation is an FTP connection. Read about how to set up an FTP connection for TotolCommander. Or you can use a file manager on your hosting.
I will use an FTP connection on TotolCommander.
Network > Connect to FTP server.

Select the desired connection and click the “Connect” button.

Open the root of the blog and copy our robots.txt file by pressing the F5 key.

Copying robots.txt to the server
Now your robots.txt file will perform its proper functions. But I still recommend analyzing robots.txt to make sure there are no errors.
To do this, you will need to log into your Yandex or Google webmaster account. Let's look at the example of Yandex. Here you can conduct an analysis even without confirming your rights to the site. All you need is a Yandex mailbox.
Open the Yandex.webmaster account.

On the main page of the webmaster's account, open the link "Checkrobots.txt".

To analyze, you will need to enter the URL address of your blog and click the “ Download robots.txt from the site" As soon as the file is downloaded, click the button "Check".

The absence of warning entries indicates that the robots.txt file was created correctly.

The result will be presented below. Where it is clear and understandable which materials are allowed to be shown to search robots and which are prohibited.

The result of analyzing the robots.txt file
Here you can make changes to robots.txt and experiment until you get the result you want. But remember, the file located on your blog does not change. To do this, you will need to copy the result obtained here into a notepad, save it as robots.txt and copy the blog to you.
By the way, if you are wondering what the robots.txt file looks like on someone's blog, you can easily look at it. To do this, you just need to add /robots.txt to the site address
https://site/robots.txt
Now your robots.txt is ready. And remember, don’t put off creating the robots.txt file, the indexing of your blog will depend on it.
If you want to create the correct robots.txt and at the same time be sure that only the necessary pages will be included in the search engine index, then this can be done automatically using the plugin.
That's all I have. I wish you all success. If you have any questions or additions, write in the comments.
See you soon.
Best regards, Maxim Zaitsev.
Subscribe to new articles!
The purpose of this guide is to help webmasters and administrators use robots.txt.
Introduction
The robot exemption standard is very simple at its core. In short, it works like this:
When a robot that follows the standard visits a site, it first requests a file called “/robots.txt.” If such a file is found, the Robot searches it for instructions prohibiting indexing certain parts of the site.
Where to place the robots.txt file
The robot simply requests the URL “/robots.txt” on your site; the site in this case is a specific host on a specific port.
| Site URL | Robots.txt file URL |
| http://www.w3.org/ | http://www.w3.org/robots.txt |
| http://www.w3.org:80/ | http://www.w3.org:80/robots.txt |
| http://www.w3.org:1234/ | http://www.w3.org:1234/robots.txt |
| http://w3.org/ | http://w3.org/robots.txt |
There can only be one file “/robots.txt” on the site. For example, you should not place the robots.txt file in user subdirectories - robots will not look for them there anyway. If you want to be able to create robots.txt files in subdirectories, then you need a way to programmatically collect them into a single robots.txt file located at the root of the site. You can use .
Remember that URLs are case sensitive and the file name “/robots.txt” must be written entirely in lowercase.
| Wrong location of robots.txt | |
| http://www.w3.org/admin/robots.txt | |
| http://www.w3.org/~timbl/robots.txt | The file is not located at the root of the site |
| ftp://ftp.w3.com/robots.txt | Robots do not index ftp |
| http://www.w3.org/Robots.txt | The file name is not in lowercase |
As you can see, the robots.txt file should be placed exclusively at the root of the site.
What to write in the robots.txt file
The robots.txt file usually contains something like:
User-agent: *
Disallow: /cgi-bin/
Disallow: /tmp/
Disallow: /~joe/
In this example, indexing of three directories is prohibited.
Note that each directory is listed on a separate line - you cannot write "Disallow: /cgi-bin/ /tmp/". You also cannot split one Disallow or User-agent statement into several lines, because Line breaks are used to separate instructions from each other.
Regular expressions and wildcards cannot be used either. The “asterisk” (*) in the User-agent instruction means “any robot”. Instructions like “Disallow: *.gif” or “User-agent: Ya*” are not supported.
The specific instructions in robots.txt depend on your site and what you want to prevent from being indexed. Here are some examples:
Block the entire site from being indexed by all robots
User-agent: *
Disallow: /
Allow all robots to index the entire site
User-agent: *
Disallow:
Or you can simply create an empty file “/robots.txt”.
Block only a few directories from indexing
User-agent: *
Disallow: /cgi-bin/
Disallow: /tmp/
Disallow: /private/
Prevent site indexing for only one robot
User-agent: BadBot
Disallow: /
Allow one robot to index the site and deny all others
User-agent: Yandex
Disallow:
User-agent: *
Disallow: /
Deny all files except one from indexing
This is quite difficult, because... there is no “Allow” statement. Instead, you can move all files except the one you want to allow for indexing into a subdirectory and prevent it from being indexed:
User-agent: *
Disallow: /docs/
Or you can prohibit all files prohibited from indexing:
User-agent: *
Disallow: /private.html
Disallow: /foo.html
Disallow: /bar.html