Clipboard - what is it and where is it located? Where is the clipboard on the computer? Accessing the clipboard using standard Windows tools
Have you ever thought that our computer carries out hundreds of thousands of different processes every day? In everyday use, there is always a clipboard, which inexperienced users most likely have not even heard of. In this article you will find answers to questions such as what is a buffer, where is it located and what is it used for?
Clipboard - what is it?
The clipboard is an intermediate data storage used to transfer any selected information, for example, from an Internet page to any text editor. The information contained in the clipboard (the original word is from English) can be used repeatedly. That is, there are no restrictions on the use of one selected piece of text.
What can you copy to the clipboard?
Intermediate data storage allows you to transfer not only text information, but also media files. For example, thanks to it, every user (PC user) can transfer images of various formats, audio and videos.
How to save to clipboard?
Clipboard works on the same principle in all Windows operating systems. Transferring temporary information to a special storage compartment is a very easy process. The first step is to copy (or cut) the necessary portion of the information you want to use. The selected information is placed in a special area of RAM, where it is stored.
Only one record at a time is stored in the intermediate storage. That is, if you first copied some text, and then any other information (for example, an image), then the first entry will be erased, and a second one will appear in its place (in our case, the image that we copied). This suggests that the information in the clipboard is constantly being rewritten. This process occurs automatically, but not without the participation of the user.
Working with clipboard is possible using special “hot” keyboard shortcuts:

Full automatic cleaning of the clipboard occurs when you turn off or restart the computer. Using this function simplifies and facilitates working with the device, since thanks to it, the information that is available in most Windows programs does not need to be typed on the keyboard yourself; you can simply copy and paste it into the file you need.
How to find the clipboard?
Most users, having learned about clipboard, wonder: how to open the clipboard? Despite the fact that it is hidden from users, it can still be found.
 On computers with different Windows operating systems, the location of the clipboard remains virtually unchanged. And yet, how to view the clipboard?
- Windows XP. In this operating system, the temporary temporary data store is located in the system folder, which can be found in two ways:
- directly to the address C:/WINDOWS/system32;
- via the Start menu: enter the menu and open the command line by simultaneously pressing the “Windows” keys (located between the “fn” and “alt” keys) + R. In the window that opens, enter “clipbrd.exe” and click “OK.”
By launching clipboard in one of the listed ways, you can view all the information stored in it.
- Clipboard in Windows 7 and Windows 8. On these operating systems, the name of the staging store has been changed to "clip.exe". The location of the file remains the same, but there is no longer an option to open it.
- Clipboard in Windows 10. As already mentioned, in recent versions of Windows OS the name has been changed to “clip.exe”. But as in the previous two versions, users are not given the opportunity to open and view it. Unless using special widgets, which can be downloaded from various Internet resources completely free of charge. Such additions allow you to view not only the latest history of saving information, but also for a certain period (a day, a week, and in some, a whole month).
How to clear the clipboard in Windows?
This article has already mentioned that clipboard has the ability to overwrite information automatically. As a result, the information previously contained in it is cleared. This is one of the ways to clear the buffer in Windows OS - copy new information.
You can delete information from clipboard using the command line. To do this, having called it (how to do this has already been discussed above), you must enter the following command: C:\Users > echo off:clip and press the Enter key. After this, permanent cleaning of the temporary file storage will begin.
If you often clean the clipboard, for your own convenience, you can create a shortcut on your desktop with this combination in its location: cmf c “echo off | clip". After launching such a shortcut, a window will immediately open for you to clear the temporary file storage.
Some devices, be it a computer or a smartphone, force us to become familiar with various kinds of concepts as we use them. So, the question of how to clear the clipboard can lead to a dead end. But if you consistently understand everything, then later it turns out that there is nothing complicated in this process.
Clipboard
Before we find out where it is and how to clean it, let’s find out what it is. So, the clipboard is a conditional storage for information. But unlike flash drives, the data here is not permanent. This is the intermediate sector that any software provides.
It is needed to transfer or copy fragments between applications. The transportation process itself is carried out using operations familiar to everyone: copying, cutting or pasting.
general information
Before you understand how to clear the clipboard, you need to know some basic information about this storage. The operating system or other similar environment is responsible for activating the buffer through the required interface. There are applications that have their own storage where temporary information is saved.
The program can store data and send it to a buffer using several formats. The most important one is placed first, followed by the least needed ones. During transportation, the most informative option that is recognized by the software is used.
For example, if a word processor uses a buffer to copy text, then the RTF format is used, if the drawing is WMF. Such a text element can be placed into any other application with its own markup and formatting.
Storage
It is important to understand before looking for where the clipboard is that an element from there can be pasted an unlimited number of times. If you copy a new element, the previous one is deleted. Although there is a set of operations that make it possible to place several elements in storage and select the one you need from the list.

For what?
Those who simply decided to get acquainted with the topic rarely understand why they need to understand how to clear the clipboard. In general, there can be many reasons. This usually happens in a couple of cases. For example, you use a PC for the whole family, but you don’t want your parents to track what you were doing.
Perhaps you copied your password or login to log into social networks, and after you a third-party user will come in and be able to find out your personal data. There is a possibility that the copied element is too voluminous. In this case, the RAM may be overloaded. In order not to turn off your PC or restart your smartphone, you can simply delete the contents of the buffer.
Prompt cleansing
There can be many options for clearing the clipboard. But there is, as always, the simplest way. If you copied a password but want to delete it immediately, copy any other element. Your data will disappear from the buffer.
To do this, you need to select any word and right-click “Copy”, or use the key combination “Ctrl + C”. This will replace all data from the storage with new ones.

You can, for example, copy any shortcut from your desktop. It takes up very little space, so it won't load your RAM. Or, as a last resort, take a screenshot of your desktop screen. This will also remove previous content from the buffer and replace it with the screen image. But such a copied element weighs a lot, since it is an image.
Command line
To clear the Windows 7 clipboard, you can use the command line. Before this version of the operating system, it was possible to call the service in several ways, but the easiest was to use the “Win + R” combination. Then in the window that appears you need to enter “clipbrd.exe”.

Now they use the command line. To launch it, go to “Start”. Next, you can type “Command Prompt” into the search, or you can go to “All Programs” and click “Accessories”. The required section will appear in the list.
Now enter “echo off | clip". Then press “Enter”. But as you understand, such cleansing takes quite a lot of time, so it can be automated.
To do this, you don’t need to look for where the clipboard is, but save a shortcut with the command. It can remain on the desktop or be located on the taskbar. To do this, right-click on the desktop, select create a shortcut and in the “Object” field you need to enter “C:\Windows\System32\cmd.exe /c “echo off | clip”” without quotes.
Don't forget to give the file a name so you can understand its purpose.

"Android"
Finding a clipboard on Android is just as difficult as it is on a PC. Therefore, you should immediately understand that a separate file with temporary data cannot be found in the system. In a smartphone, this storage is an integral part of the RAM. In fact, the same self-cleaning works here as on a computer. To delete previous data, copy new data that is less important to you.
There are some phone models that still provide the ability to clear the clipboard. Android usually saves several fragments at once in such devices, and then offers to insert the desired fragment. In this case, it will be enough to simply perform a long press on the touch screen. In addition to the “Paste” or “Copy” options, you will have a “Clipboard”.
When you go to this menu, all saved options will be available to you, you can clear everything.
Programs
Both on your computer and on your smartphone there are special programs that help you clear your clipboard. For example, you can download ClipTTL on your PC. The software automatically clears the clipboard every 20 seconds.
Clipdiary has more advanced features. For example, it manages all buffer contents and supports the use of hotkeys.
There is a good Clipboard Manager app for your smartphone. Helps you easily manage all temporarily stored data and free up RAM.
This article will be divided into two parts:
- for newbies who have just started learning about computers and want to know where the clipboard is and what it is;
- for more experienced users who like to dig deeper into the files of the Windows operating system and answer some questions that haunt them;
We immediately offer a video on this topic
About the clipboard in simple words - for beginners
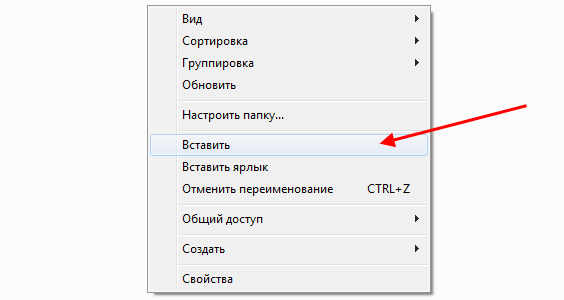
When we hover the cursor over a file or folder, right-click and select “Copy” (or the Ctrl+C key combination), at this moment the information is placed on the clipboard.

We can copy anything there: text, folder, pictures, video files, audio recordings and other files. The computer will allocate the required space in RAM to store the required amount of information in a buffer.
You can imagine that this is the computer's RAM, or a kind of invisible area where information is placed for a while and then deleted.
That is, when we go to the desired location on our computer and again right-click, but select “Paste” (or the Ctrl+V key combination), then the folder, or file, or piece of text that you copied will will be taken from the clipboard and pasted into the place you need.
This means that a novice user should not worry about where exactly this information is stored. The main thing is that we can insert it into the place we need.
It should also be understood that when you click “Copy” again, the old information in the buffer is replaced with new one and when inserted, a new one is naturally inserted. The same thing happens if you “cut” something.
You can also paste information from the buffer any number of times, i.e. When inserting, information from there is not deleted, it is, as it were, copied.
And if you copied a folder, then you can paste it onto drive C, drive E and any other location on the computer.
Also note that if you copied a piece of text from a document, say Microsoft Word, or a web page, to the clipboard, then you need to paste it into the document or text field. You can't just paste it into a folder.
And vice versa, you will not paste the copied folder into the document either.
Also be careful with important information that you have copied to the clipboard: if the computer unexpectedly turns off, reboots, or you accidentally forget and turn it off, the information on the clipboard will be deleted.
Therefore, immediately when something is placed in it, paste it into the place you need and save it, if it is some kind of document.
There is no need to clear the buffer, because when copying a file or text, it replaces the previous one and therefore your computer’s memory will not become clogged.
Key combinations that are necessary for operation
Answer about finding the clipboard for more advanced ones
Perhaps there are those among readers who want to know where that secret folder is, or that invisible space called the clipboard.
Finding the clipboard in Windows XP
In the Windows XP operating system, you can go to drive C, or the drive on which it is located, then to the “Documents and Settings” folder, and then to “System 32”, that is, the path is: “C:/Documents and Settings/System 32".
There is file (special program) clipbrd.exe, by running which you can see that there is exactly what you copied.
You can find this file faster and run it without even going to the “System 32” folder, but simply go to the “Start” > “Run” menu, enter clipbrd.exe and press the enter key.
Now I will give an example of how this program works. I'll select a piece of text and click copy.

And then I will launch the clipbrd.exe file. We will see that this text is located exactly there:

This means that this is the secret place where information copied to the clipboard is stored - in the standard program clipbrd.exe for Windows XP. If you just turned on the computer, then it will be empty, since nothing has been copied there yet.
If there is already some information there (in my case there is already text), then you you can remove it if you wish through the “Edit - Delete” tab or click on the cross, which can be found on the toolbar of the clipbrd.exe program under the tabs.
Buffer situation in Windows 7 and Vista
In later versions of Windows OS, such as Windows 7 and Vista, the standard clipbrd.exe program is missing.
To replace it, there is a file called clip.exe, which is responsible for storing information for the clipboard, but you will not be able to launch it and see what is there either.
But if we hover over this file, we will be shown information that the file is indeed intended for these purposes.

Convenient programs for working with the clipboard
I present several convenient programs that have proven themselves.
CLCL 1.1.2 program for Windows
For Windows Xp and Windows 7 and some other versions, there is a very good free program CLCL 1.1.2. It does not require installation, is easy to launch and does not take up much space.
After unpacking the archive you will see only 4 files, run “CLCL”

After launch it is minimized to tray

By clicking on the icon, it opens and you see that there are those documents or texts that you copied.

For convenience, on The screenshot shows a list of the main advantages and features of the CLCL 1.1.2 program.
Comfort Clipboard - convenient manager
For Windows 7 There is a handy utility called Comfort Clipboard. You can search for it through Google.com or Yandex.ru, download and install.

- Its capabilities:
- When you copy Something, the program not only copies and saves the fragments you need, but you have the opportunity to select previous text fragments, folders and other files copied to the clipboard. It does not replace, but stores it separately in its memory;
- When you turn off the computer, the information placed in the program is not deleted. You can remove it when you no longer need it;
- Setting up hot keys, changing the design, and a clear interface makes the program very convenient to work with the clipboard;
We've all asked this question. But usually the solution came down to replacing the data with others by copying a small part of the text (so to speak, “cleaned up”). But what if the copied information is needed, but the data type is unknown? Let's look at how to view and clear the clipboard in Windows 10.
Let's start with the fact that the clipboard is an area of RAM in which a copied (Ctrl+C) or cut (Ctrl+X) object is stored. It can be text, image, file, etc. You can paste (Ctrl+V) the content into the appropriate location: a text editor, a folder on your hard drive, etc. You can also perform these operations using the right-click context menu.
How to view the clipboard?
There are several ways to view copied content.
Insertion into a suitable environment
If the type of data on the clipboard is known, the user can guess where it is displayed. For example, the text should be looked at in any text editor, and the file should be looked at in a folder on your hard drive.
Using third party software
For heavy users of office applications, it is recommended to download the CLCL application. It will allow you to view, edit and clear the clipboard in two clicks.
How to clear the clipboard?
If you know or are not interested in the information stored in RAM, you can delete it. There are several ways to do this.
Replacing content
Regular replacement of information. If the clipboard stores video files, photos or other large objects (and all of this affects the speed of the computer), then you can simply copy part of the text or a shortcut, which will take up to 3 megabytes of RAM and will not affect the performance of the system. 
Cleaning using the command line
This method will completely clear all clipboard data.
To do this you need:

That's all, the clipboard is empty. But if you need to use this function more often, and each time calling the command line and entering the required instruction is quite inconvenient, we will create a “script” for automatic cleaning.
To do this you need:
- On an empty area of the desktop, right-click and select “Create” – “Shortcut”.

- In the “Object” field, enter the command C:\Windows\System32\cmd.exe /c “echo off | clip” and click “Next”.

- In the new window, edit the name of the shortcut and click “Done”.

- All! Now a homemade mini-program will clear the copied information.
The clipboard is an area of RAM that is used to temporarily store information. When the user is about to copy one file and paste it into another folder/drive, then this information is placed on the clipboard until further use. In your daily work with your computer, you will not see all the described actions, since they are not displayed in the OS graphical interface. Let's figure out how to view the clipboard in Windows 10 and what actions you can perform with it.
Keyboard shortcuts for working with the clipboard should be familiar to all users of Windows operating systems, starting with the oldest versions. All operations are carried out using the Ctrl key + one of the letters:
- Ctrl + A selects all content (text or files);
- Ctrl + C allows you to copy selected objects;
- Ctrl + V allows you to paste what you copied;
- Ctrl + X cuts out the entire content and places it on the clipboard.
Using the methods described in this manual, you will learn how to clearly see copied files or text, as well as how to clear the buffer of unnecessary information.
Where is
In all versions of the OS before Windows 8, the user could manually launch the visual interface of the clipboard and work with it. To do this, you had to open the file clipbrd.exe, which was located in the directory on the windows\system32 system partition.
However, for security reasons, Microsoft decided to completely remove this feature in modern OS. But you can still download the clipbrd.exe file and run it on your computer. As a result of launch, you will see the following window:

It will display all the copying on your computer in real time. The application will run on both x32-bit and x64-bit architectures.
Here you can:
- save buffer history to a separate file. To do this, click on “File” - “Save”. The “Open” button will load a previously saved history file into the program;

- view the content that is displayed in the main window;
- clear using the X button on the top panel.
By the way, this manager is not relevant for Windows 10, since when copying, the operating system changes all values for security purposes. Therefore, all that clipbrd.exe is good for on new versions of Microsoft OS is clearing the contents of the clipboard. However, this can be done in other ways:
- just copy other information. Then the previous data will be deleted from RAM;
- clean using the command line;
- clean using additional programs.
First, let's finish looking at standard PC tools.
How to clear via command line
If everything is clear with repeated copying (just press Ctrl + C, selecting new elements to replace old ones), then we need to talk in more detail about the command line. You can run it and enter the clearing combination once, or create an executive file that will clear the clipboard with just one click on the icon. First method first:
- Launch the Run application using Win + R. In the field, enter the command “cmd” and run it with administrator rights using the key combination Ctrl + Shift + Enter.

- In the window, write the command “echo off | clip" and press Enter.

- Ready! Now all data will be deleted.
If you need to use this function more than once, then you can create an automatic script. To do this, follow these steps:
- Right-click on an empty space on the desktop and select “Create” - “Shortcut” from the menu.

- In the field, paste the link to the location of the object along with the command “C:\Windows\System32\cmd.exe /c “echo off | clip"" and click "Next".

- Enter any file name and click on “Finish”.

- Now a corresponding shortcut will appear on the desktop.

Let's look at the capabilities of several third-party utilities.
You can download the distribution kit or portable version of the program from the link. The program will allow you to view the history of temporary data, find the file you need and completely delete the entire database. The portable version of the utility is convenient in that it can be located on any medium and can be launched without installation. To enter ClipDairy, just click on the executive file.
After launch, a corresponding widget appears on the Start panel, by clicking on which you will quickly gain access to the main program. In its main window, you can view the entire history of temporary data. Here you will see everything that was previously copied/pasted on your laptop or PC, as well as what will be copied in real time.

Using the context menu on the RMB, you can perform a number of actions with this or that information:

To access the program parameters, you need to go to “File” and call “Settings”:

Here you can customize the appearance, expand the content window, configure hotkeys, etc.

You can find a tool for clearing the clipboard in the “File” - “Database” menu:

To completely clean it, you need to click on the “Clear database” button and then confirm the action with the “OK” button.

If you want to increase the functionality of the software and work with more settings, then use another utility.
CLCL 1.1.2
CLCL 1.1.2 is a utility for working with the clipboard and many settings for the log, clearing, keys, and so on. The entire program interface is completely in Russian, so there should be no problems learning the functionality.
For the purposes of this article, we are only interested in viewing the temporary data log and clearing it completely:
- the “Clipboard” branch stores all recently copied information;

- The “Log” section contains the entire history from the moment the program was installed on the computer. You can search for the necessary files in the general list and copy them again.

- to delete early temporary information, select all entries using the Ctrl + A combination and click on the cross in the top panel.

Bottom line
The ability to delete and track temporary files can be useful to the user in many cases. Using the software, you can find a lost document that was copied several hours ago, or erase copied passwords for security purposes.
Video


